
Project Paint revival-2000 Honda Civic Repaint
 Settled In
Posts: 30
Joined: Thu Sep 29, 2011 5:43 am Country: USA |
I'm following this build closely can't wait to see the finished product.
|
 Settled In
Posts: 93
Joined: Wed Nov 30, 2011 10:35 pm Location: Kingston, Ontario Country: Canada |
Thanks!
I am super stoked to finish up and get going on it! Matt HellaFab.ca
|
|
Settled In
Posts: 93
Joined: Wed Nov 30, 2011 10:35 pm Location: Kingston, Ontario Country: Canada |
going to finish up this car this weekend!
hopefully get the rest of the body painted and if i can get the body painted friday night or saturday morning i hope to drop the engine back in the next day after i clean it up with a little maintenance work. (release bearing, waterpump and timing belt) HellaFab.ca
|
|
Settled In
Posts: 93
Joined: Wed Nov 30, 2011 10:35 pm Location: Kingston, Ontario Country: Canada |
Teasers...
  Full update to come with real pics. HellaFab.ca
|
|
Settled In
Posts: 93
Joined: Wed Nov 30, 2011 10:35 pm Location: Kingston, Ontario Country: Canada |
Weekend of March 18 Update!
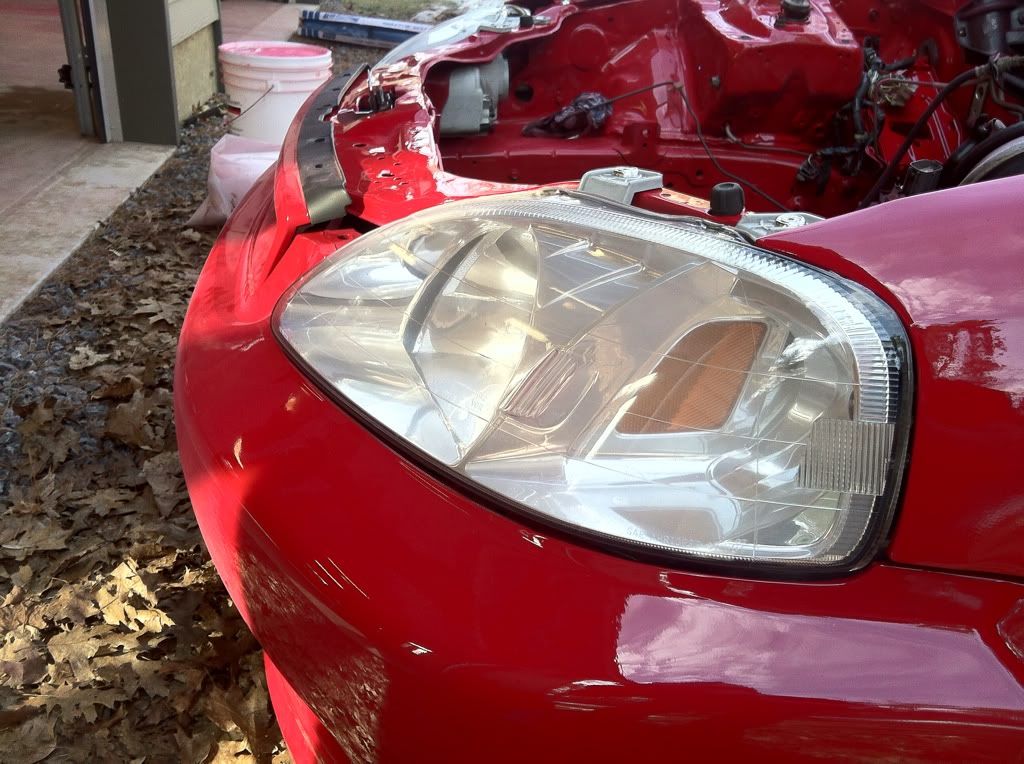
Well, the snow is pretty much gone and I am super stoked with this weekend’s progress. I did have a few minor setbacks throughout the weekend –one that I still need to address- but the paint and body assembly is for all intents and purposes complete. Now I just need to get the drivetrain back in and do a full wet sand and polish to get rid of some grit and orange-peel on one quarter panel. Friday Friday night it was slow going because I didn’t make it there until around 8. I don’t have any pictures to share of Friday night but I worked on the chassis until 11:30pm getting the previous layers of base coat scratched up to accept fresh coats on Saturday morning. Saturday After waking up late Saturday morning I managed to finish sand the spoiler for repainting since I had a problem with it before and finish sanded my headlights for restoration. Once I was done with that I tack ragged the whole car and set to completing the basecoat. I did run into an issue on the driver front fender not accepting base and it was blistering from a layer of zinc chromate primer from an aerosol can that I had put on in the earlier stages of bodywork to keep some bare metal from rusting. So I had to cut this whole panel down, mask off the car from it and sand/prime/paint it. A serious setback. Then I was on the move again on St. Patricks day. I finished painting and clearing the car with no troubles besides one insect flying into the middle of my hood after my 2nd coat of clear. 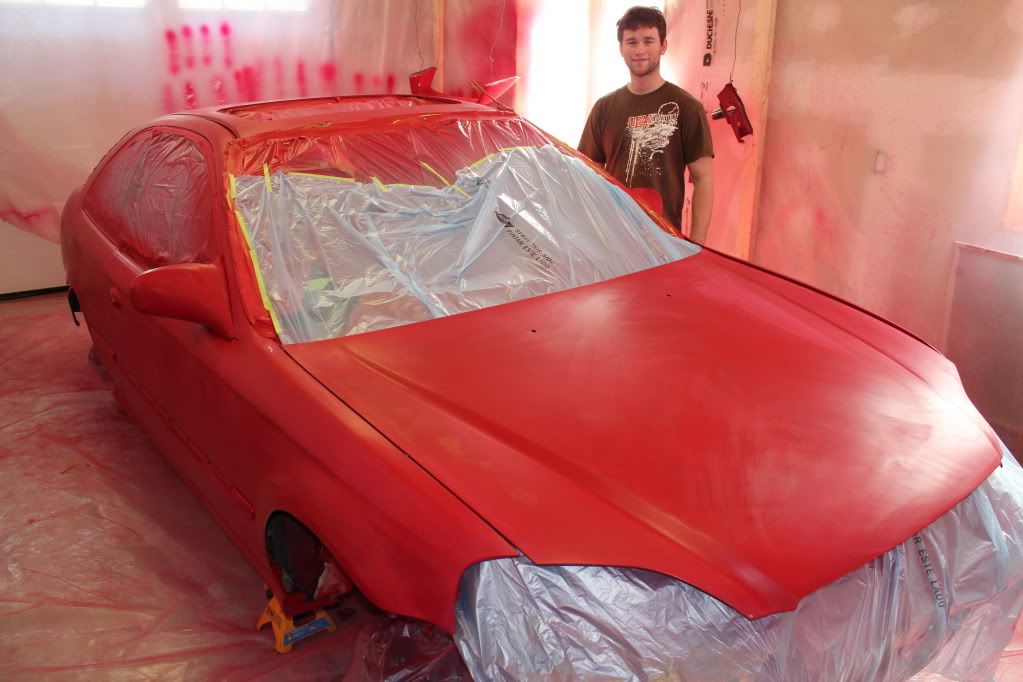 Prepped and ready for paint Saturday morning. 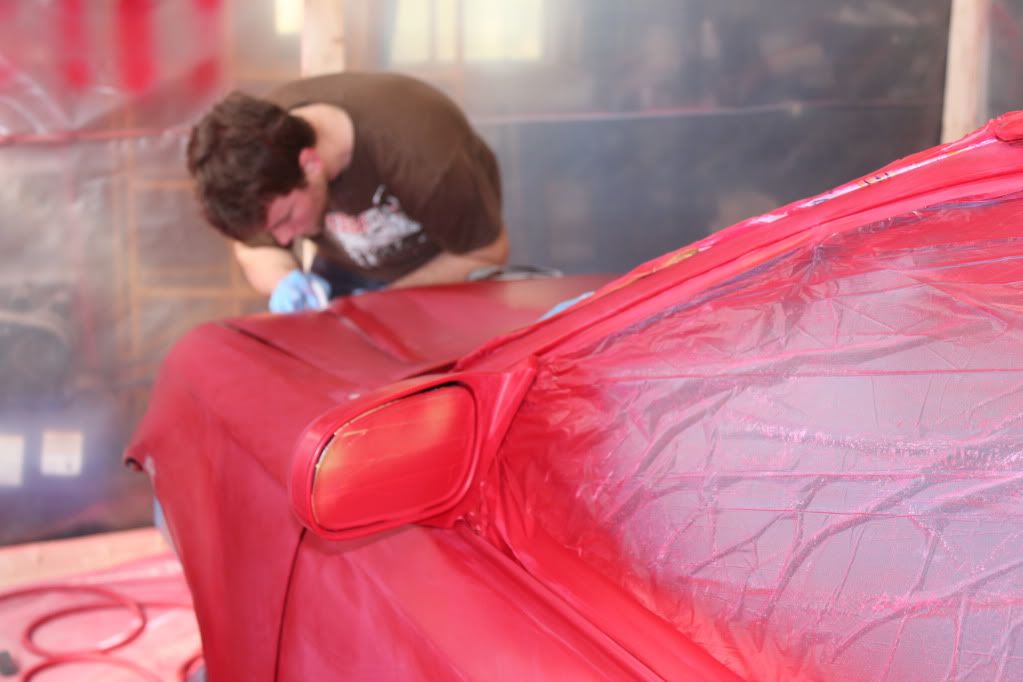 Sanding out a drip in the base from not using a proper gasket on the paint gun lid. 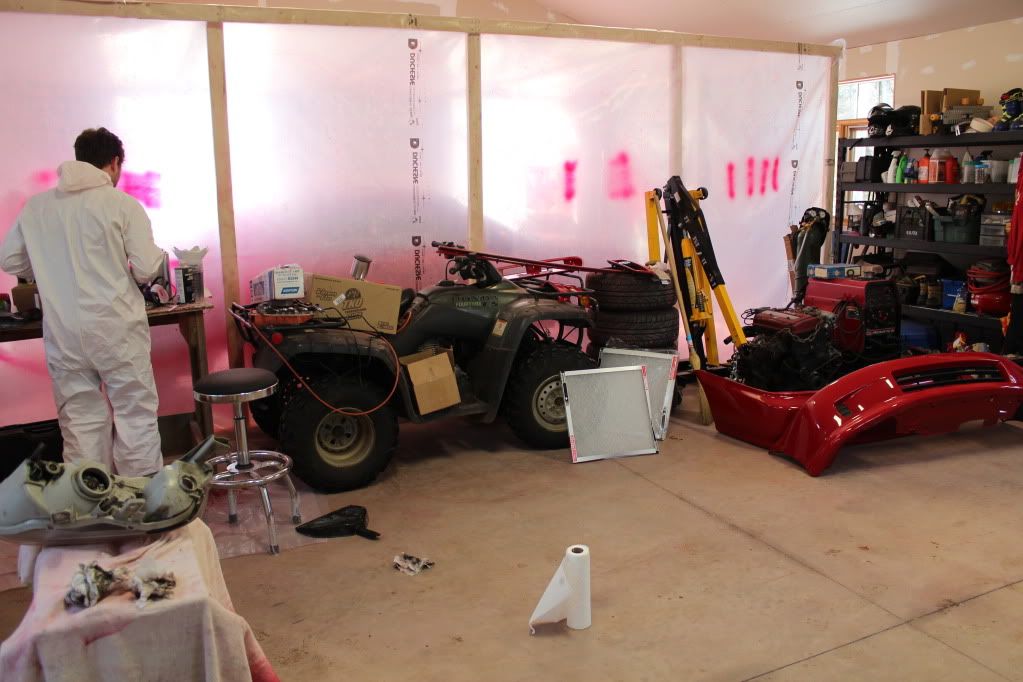 Mixing paint First coat of clear ON! 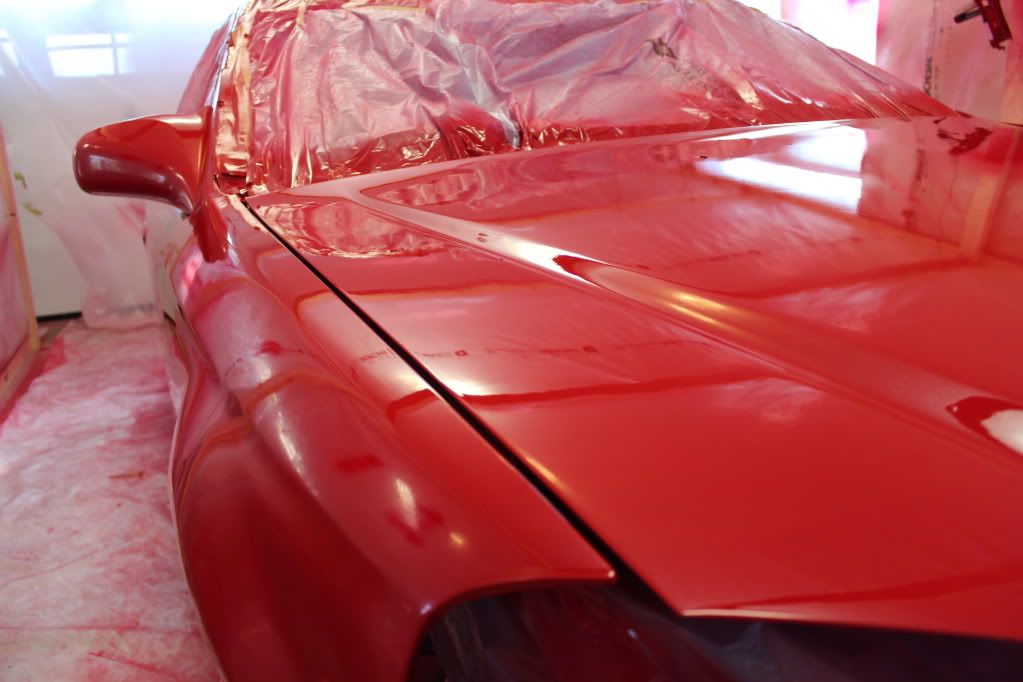 All cleared up.  Headlight restoration completed! 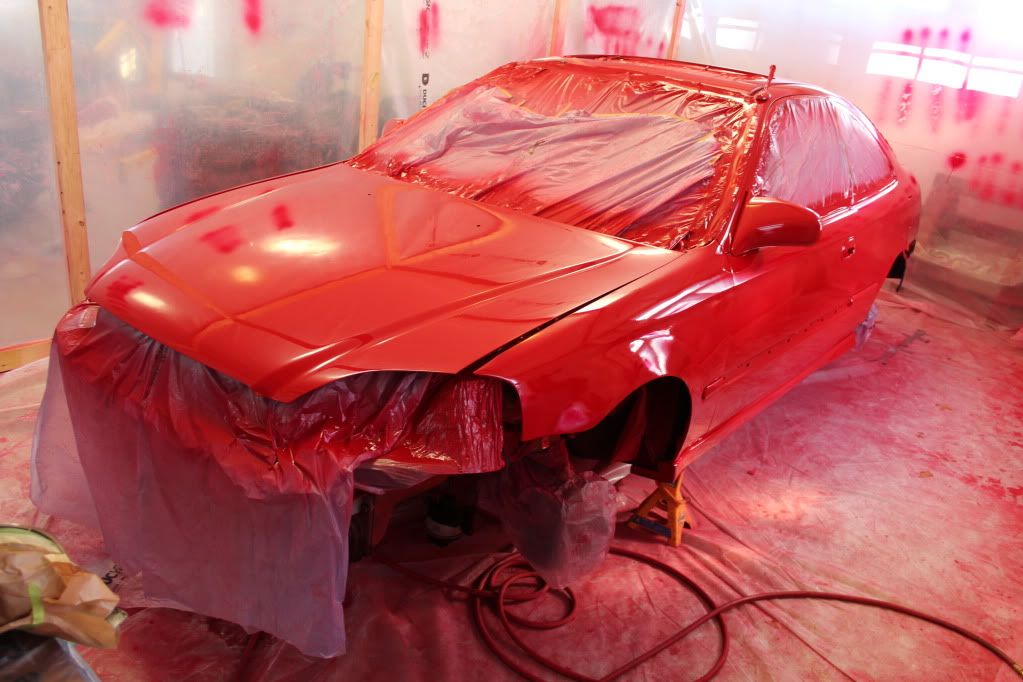 Clear 100% done. 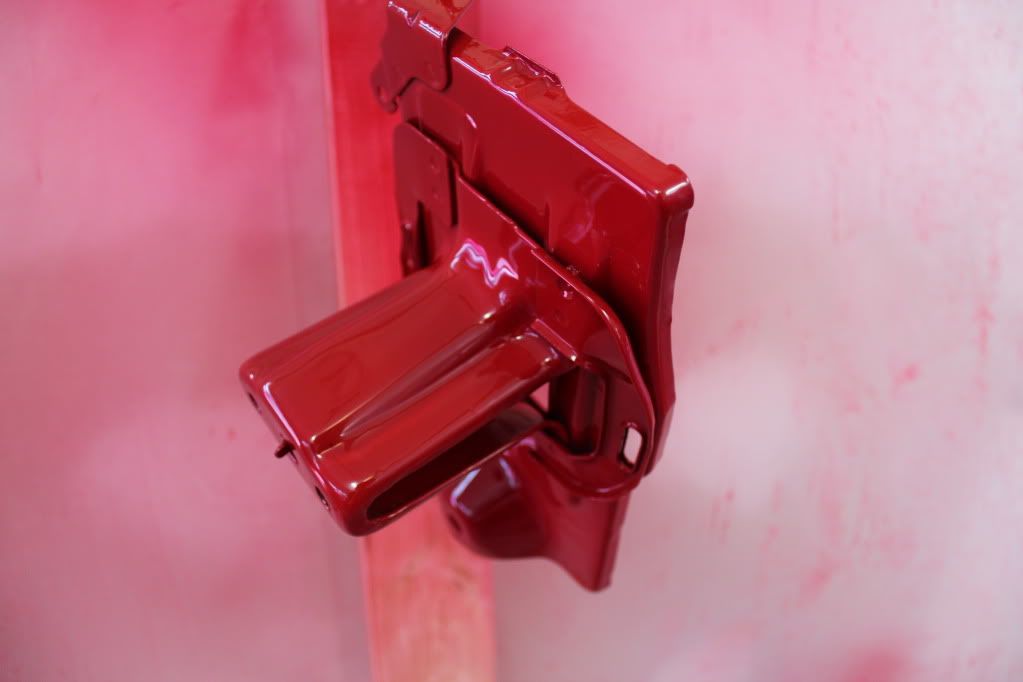 Even painted the battery tray Sunday Sunday was pretty basic and a chill day. I changed my clutch release bearing out since my old one was making noises and then started on changing the waterpump. All was going really smoothly until - without noticing – I put one of the long bolts in a short hole when installing the new waterpump only to bottom it out and eventually break it off. I didn’t have a big enough easy-out tool so I have to fix that next time I go up. Once I was done breaking things I moved on to reassembly of the body parts of the car and garage cleanup. 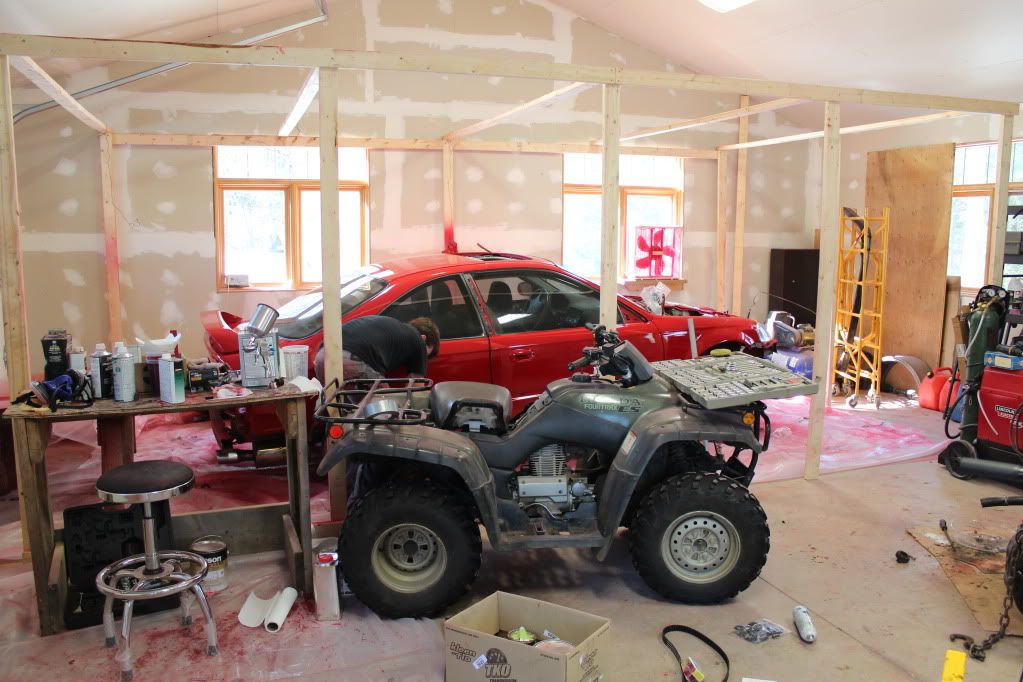 Time to take down the paint booth 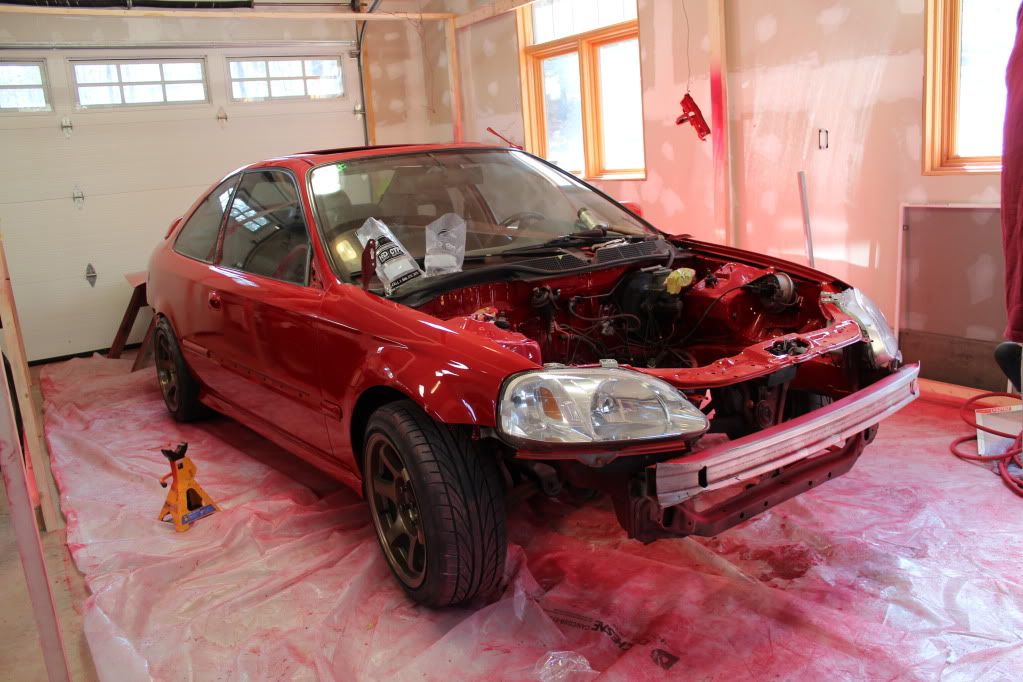 Starting reassembly 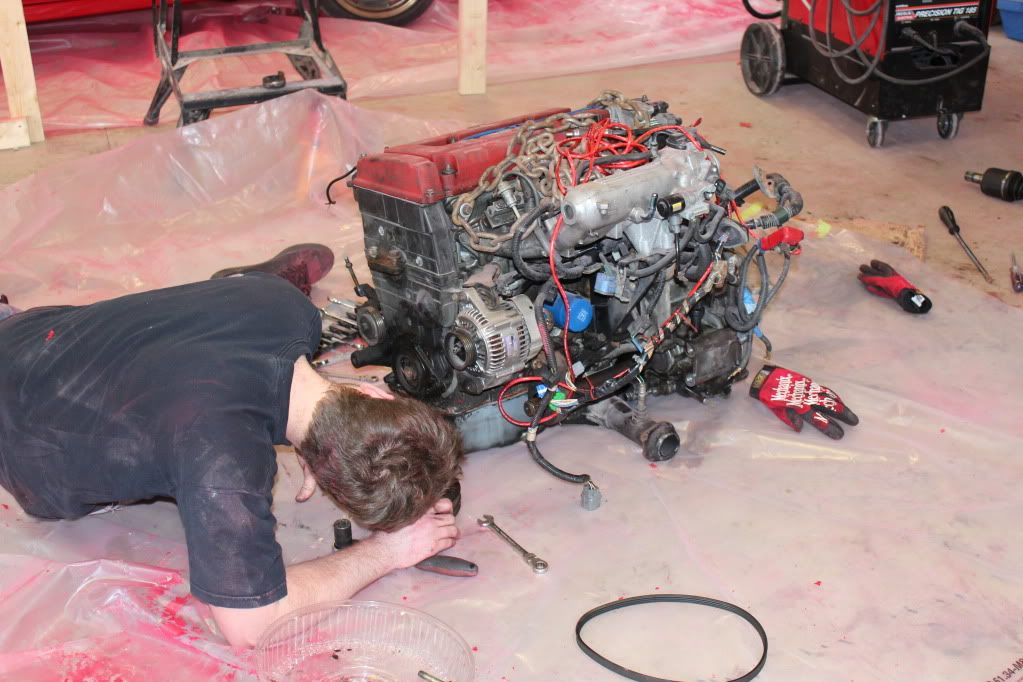 Starting to break bolts doing a water pump install. 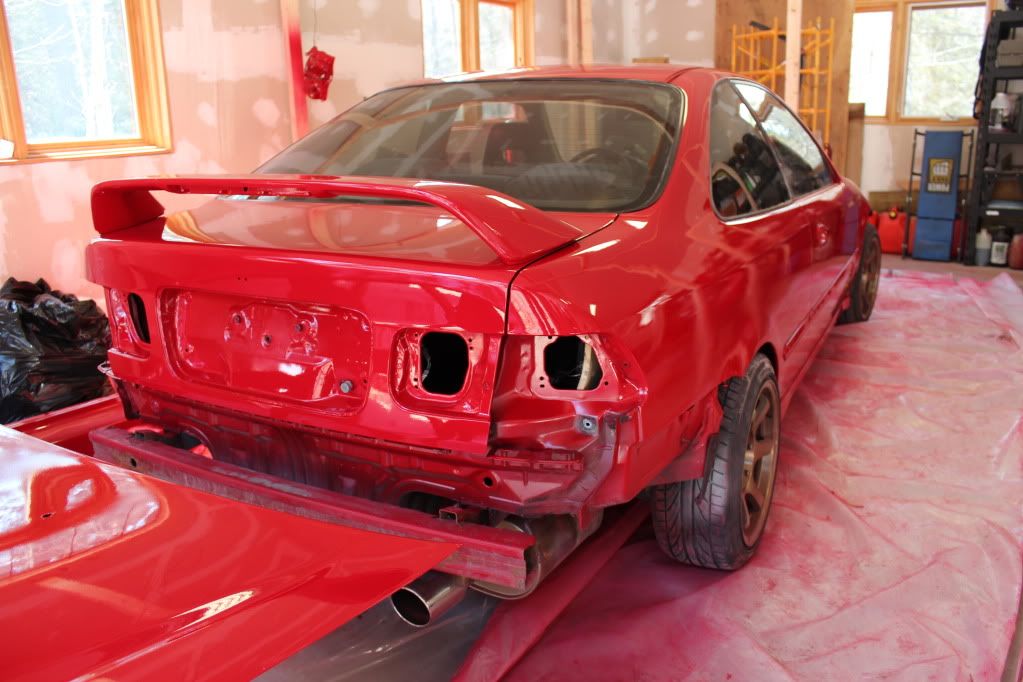 Spoiler on 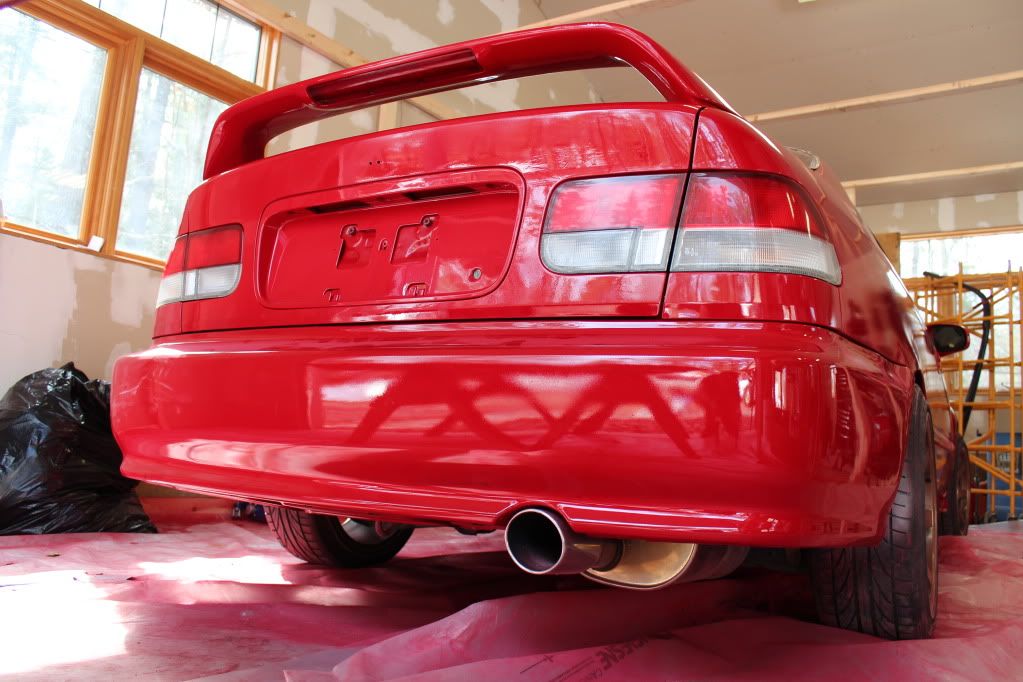 Rear end put back together. 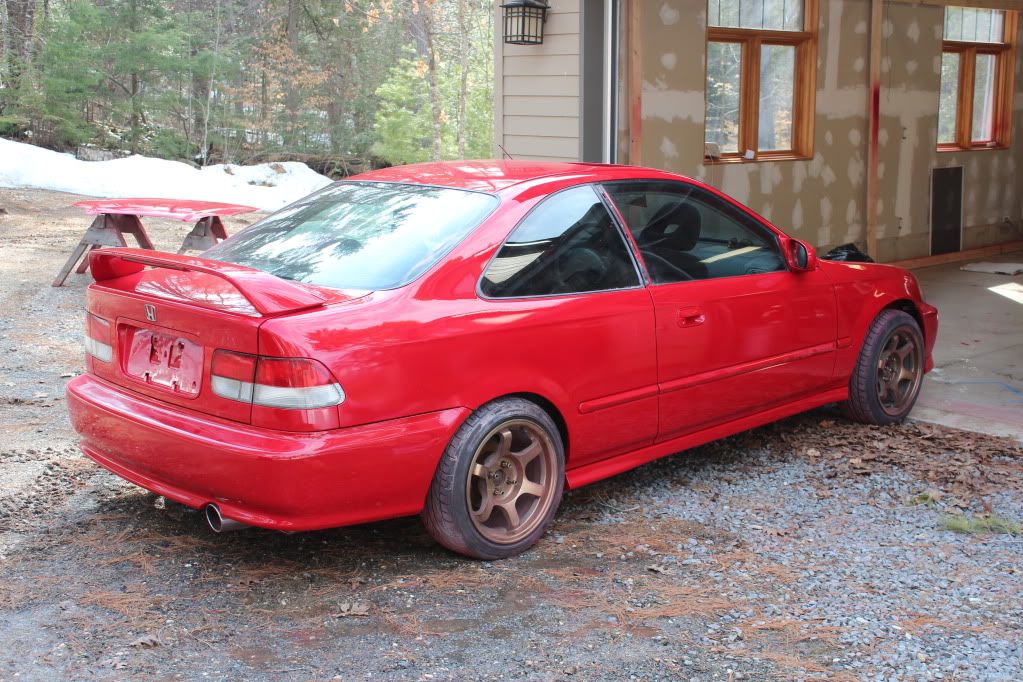 Pushed outside to clean the garage 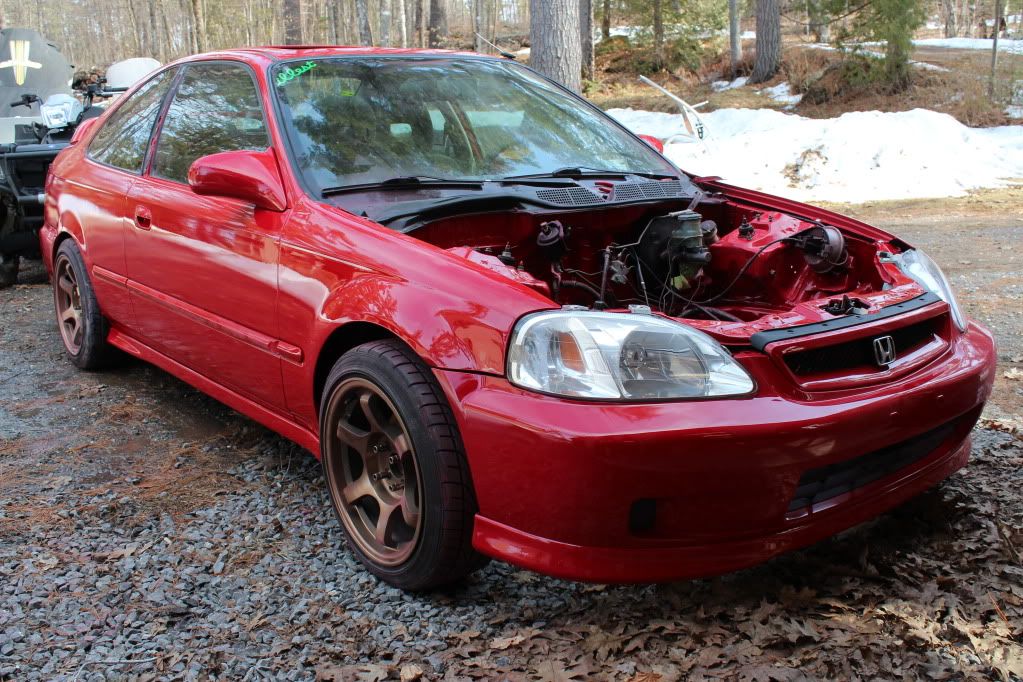 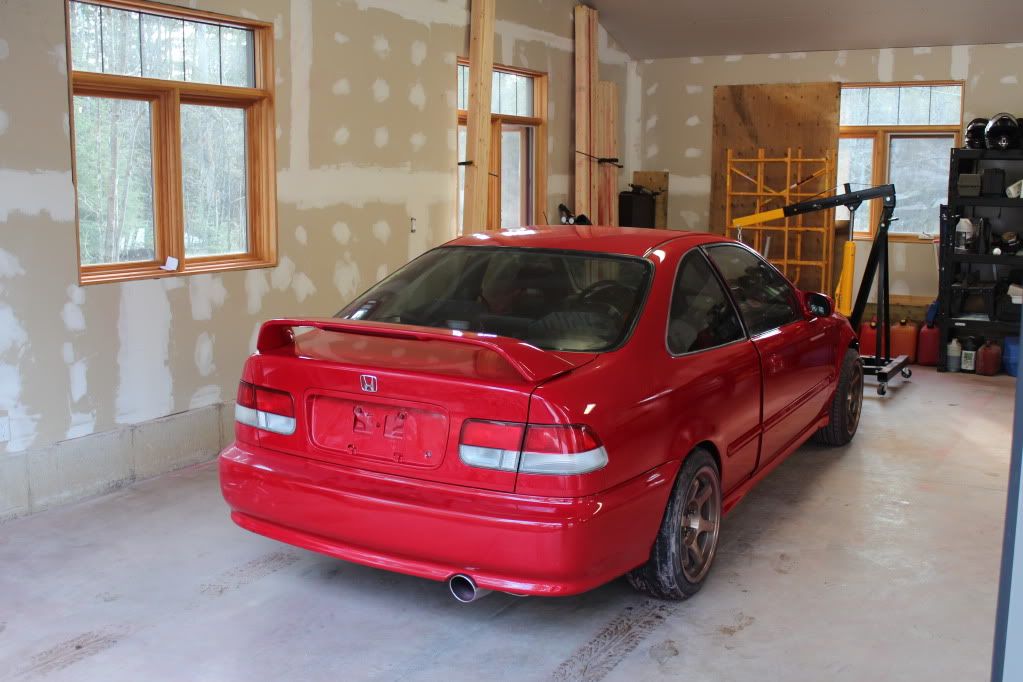 Back inside awaiting some engine again. 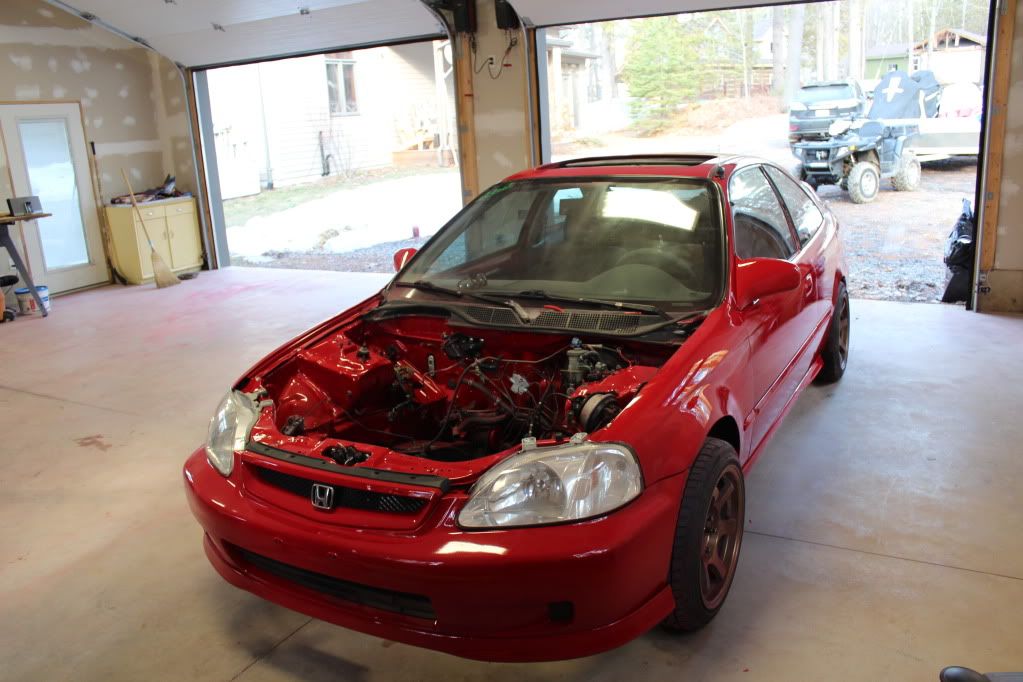 I will conclude with my favorite shot of the weekend: 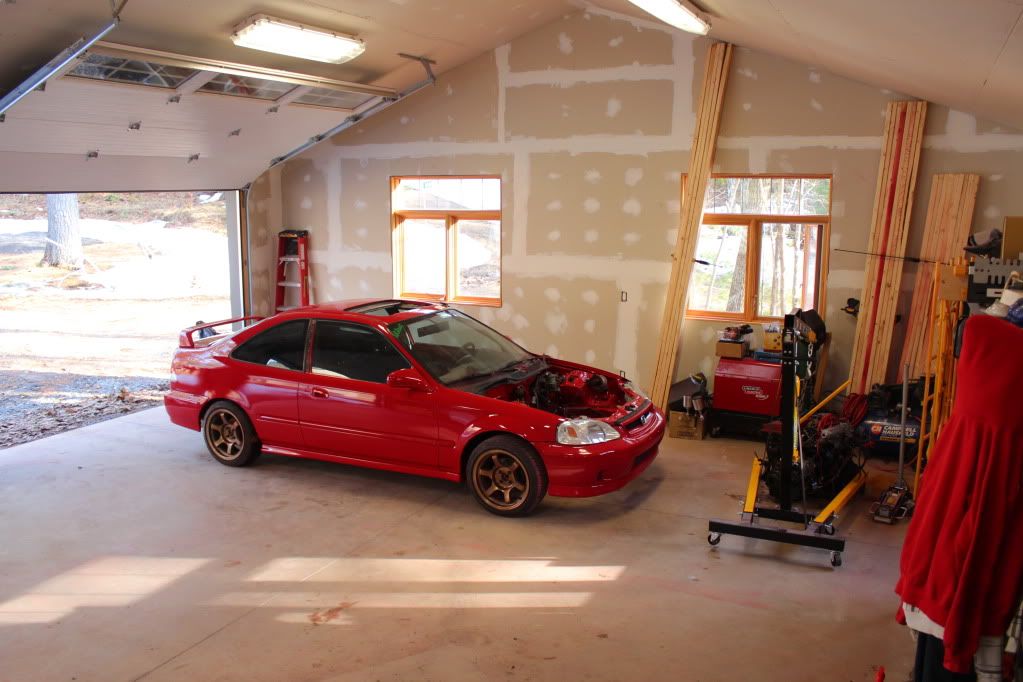 HellaFab.ca
|
Settled In
Posts: 30
Joined: Thu Sep 29, 2011 5:43 am Country: USA |
I Looks great! I don't know if I missed it but what gun did you choose to spray the car and how did you like it?
|
|
Settled In
Posts: 93
Joined: Wed Nov 30, 2011 10:35 pm Location: Kingston, Ontario Country: Canada |
I used a Devilbiss Startingline kit with the primer and the base/clear setup. It worked pretty well for me as its the best I have used yet. I was using a Princess Auto (HF) gun before and i could never get it dialed in properly.
I did mess up a little bit with the Startingline gun though which was completely my fault and I didnt clean the air cap well enough which caused some problem with uneven fan pattern. Once i cleaned it better it was fine though. Doing it over i would order a gun that you can get replacement parts for. HellaFab.ca
|
|
Settled In
Posts: 93
Joined: Wed Nov 30, 2011 10:35 pm Location: Kingston, Ontario Country: Canada |
yeah buddy.
no real progress pics of this because the whole engine install including doing the waterpump and timing belt only took about 3 hours. here are some together pics at my cottage before bringing it back to kingston. 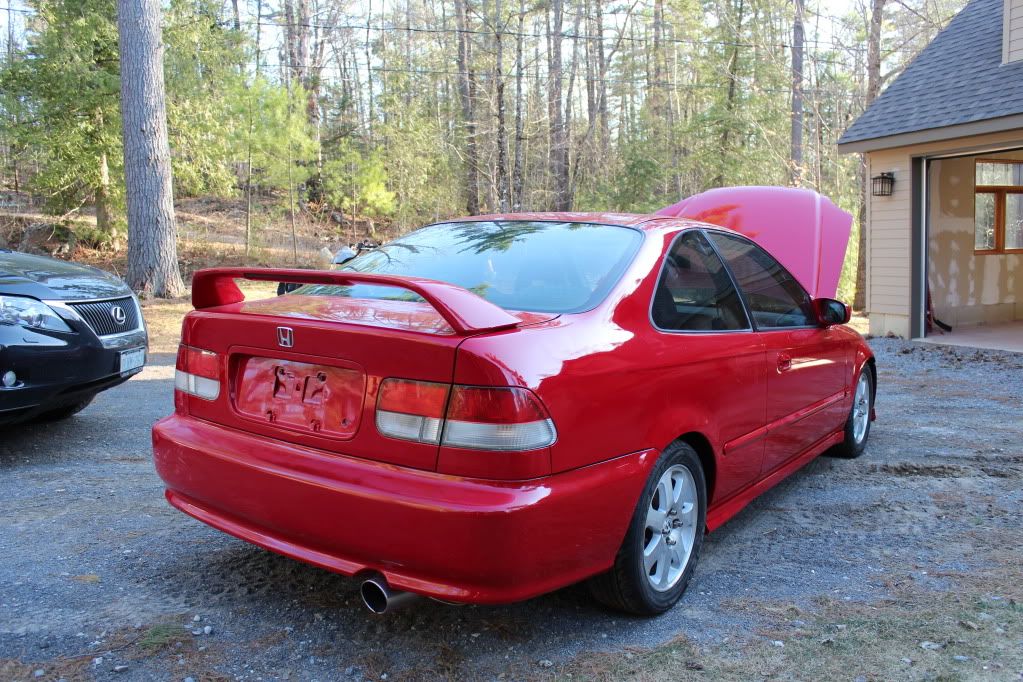 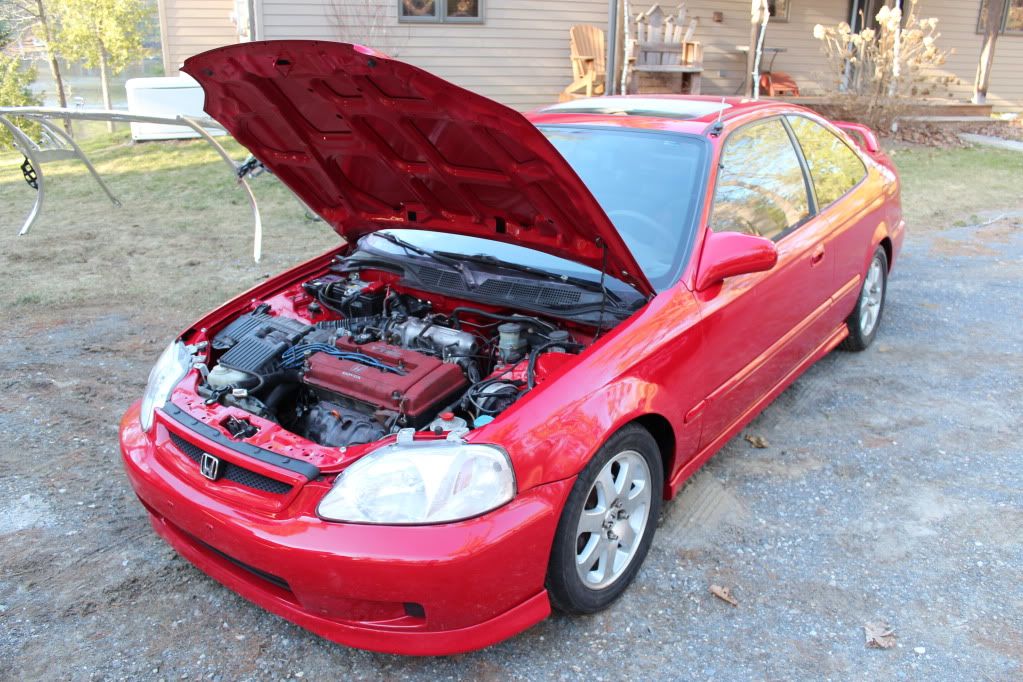 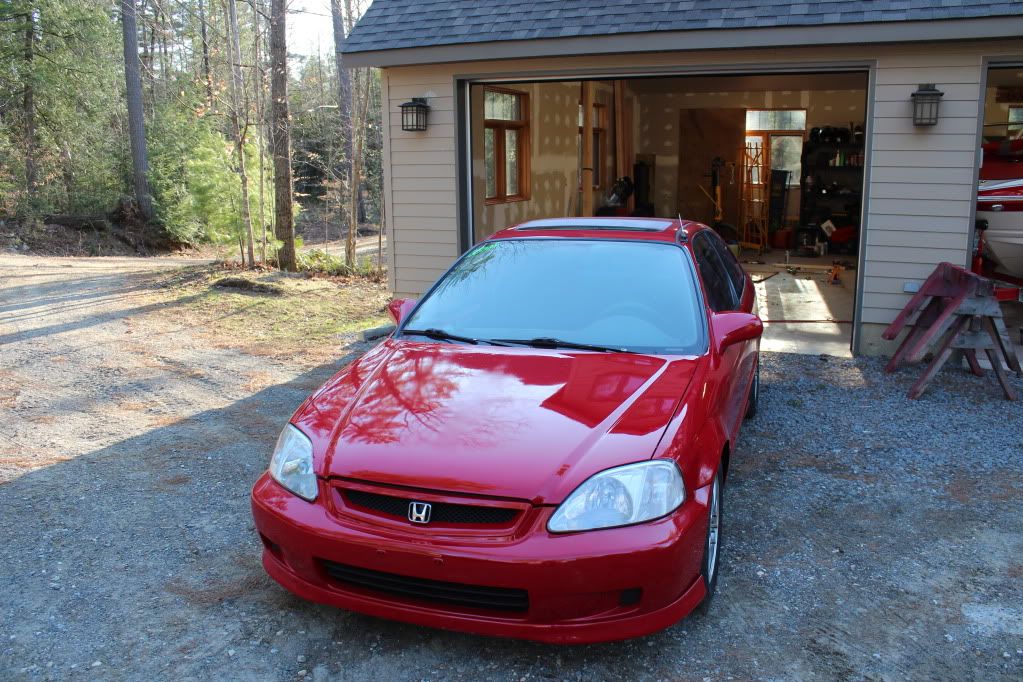 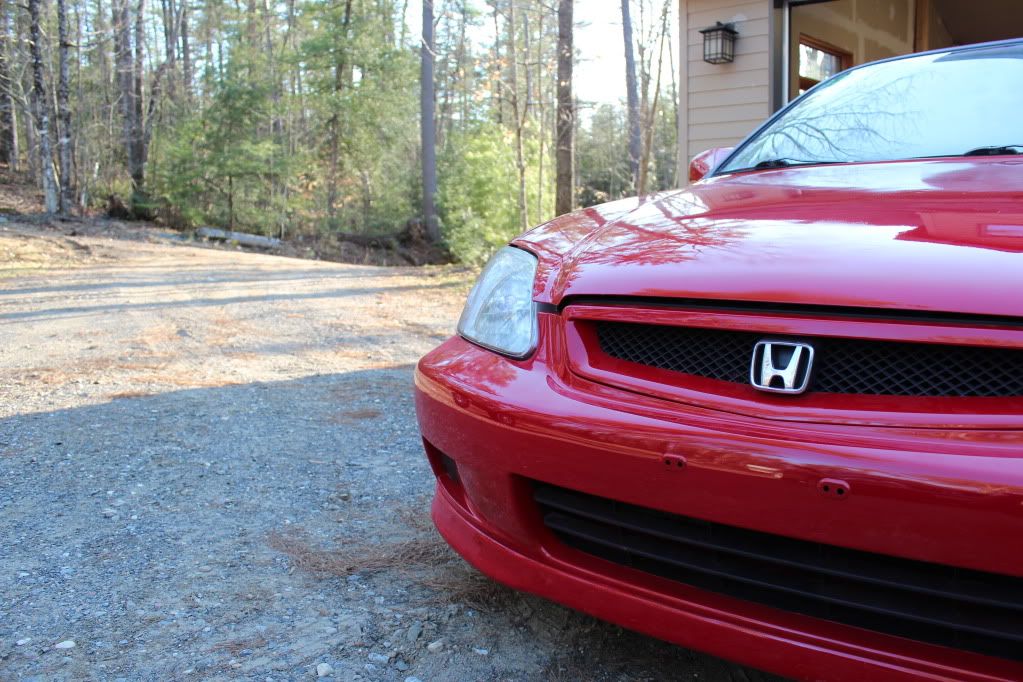 there is some work to be done to it still to get it the way i want body wise that will come out with a wetsand and buffing but for now im just going to drive it cause im getting lazy. the one thing is the hood.... the dry line down the middle where i went from one side of the car to the other. idk really why it happened but i am guessing i didnt overlap enough in the middle to keep it wetted out. oh well... HellaFab.ca
|
 Top Contributor
Posts: 3110
Joined: Wed Dec 01, 2010 10:52 pm Country: USA |
Not bad at all. At least buff the hood if it bothers you. Might take thirty min to an hour tops cut and buff.

Never argue with an idiot, he will drag you down to his level and beat you with experience.
|
Settled In
Posts: 81
Joined: Wed Aug 17, 2011 11:37 pm |
Sweet lookin ride,I did one last year too...same color milano red bc/cc!

|
Return to Completed & In Progress Member Projects
Who is online
Users browsing this forum: No registered users and 97 guests
Powered by phpBB© 2000, 2002, 2005, 2007 phpBB Group
Advertisements by Advertisement Management