Getting it roughed in
Settled In
Posts: 60
Joined: Wed Aug 15, 2012 9:03 am Country: USA |
Getting closer on the rear quarter repair work.
Getting it roughed in |
Settled In
Posts: 60
Joined: Wed Aug 15, 2012 9:03 am Country: USA |
Jack of all trades.
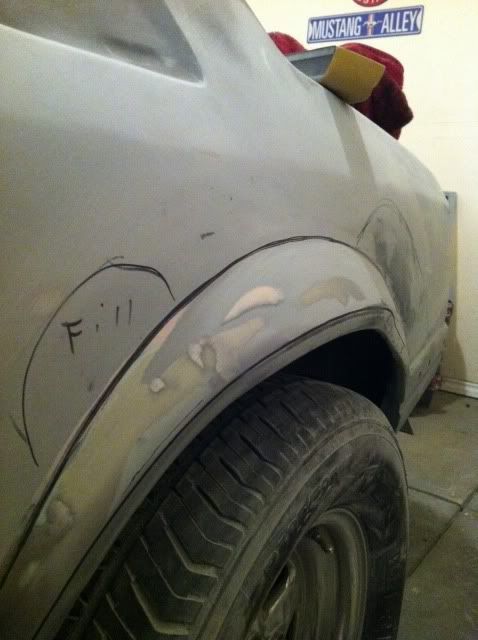
  Both front fenders are on the list to 2k prime tomorrow. Then it's guide coat and more sanding... |
Settled In
Posts: 60
Joined: Wed Aug 15, 2012 9:03 am Country: USA |
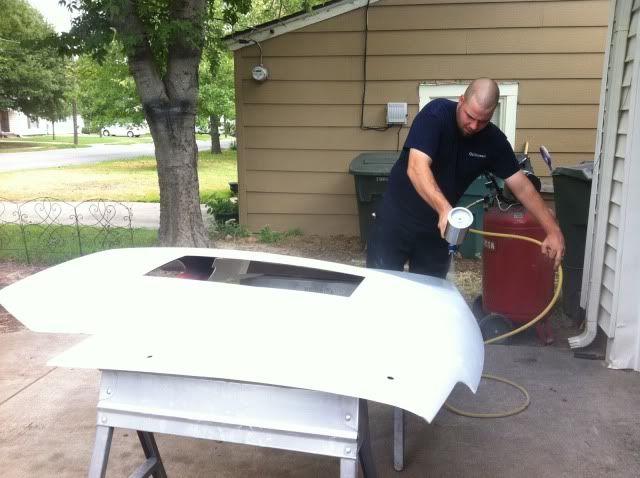
More 2k primer....
 Laid down smooth  |
Settled In
Posts: 71
Joined: Tue Nov 15, 2011 3:05 pm Location: Mass Country: USA |
The new big rims "Pro Touring" fad is OK
 But it's still cool to see a car with an old school blower sticking through the hood.  And being in your twenties is the time to do it.  Looks like it's going to be an awesome ride. 
|
Settled In
Posts: 60
Joined: Wed Aug 15, 2012 9:03 am Country: USA |
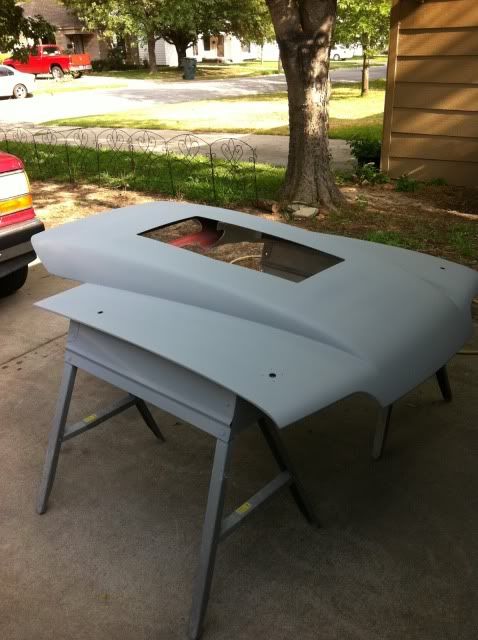
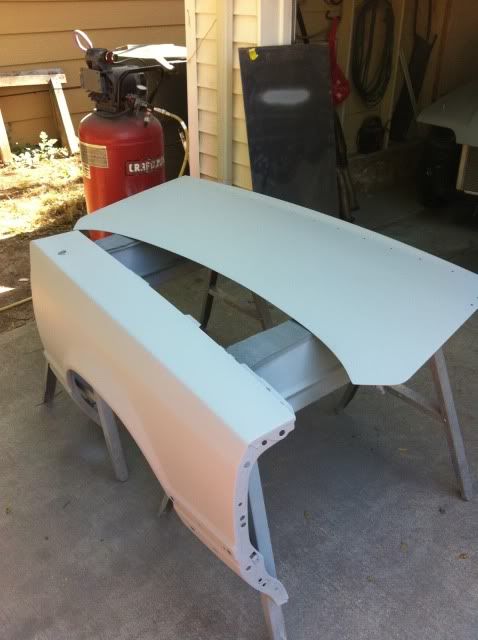
Looky what I got.
 Here is the rear quarter that was torn to ****. Getting real close to finished on the front half. 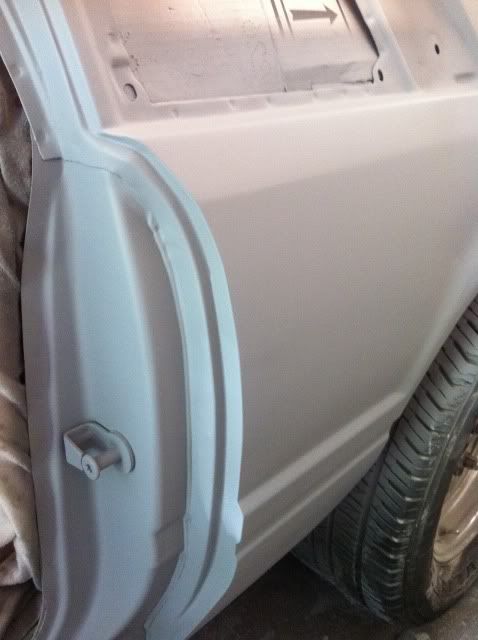 And painting one of my sons toys with the grabber blue. Just a quicky but it'll do. Will clear coat tomorrow. 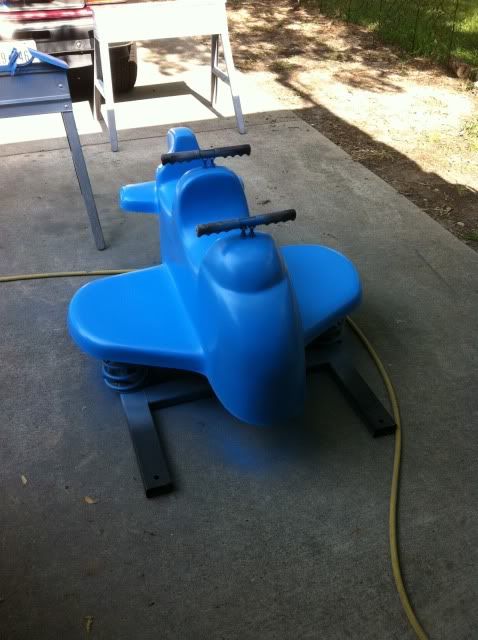 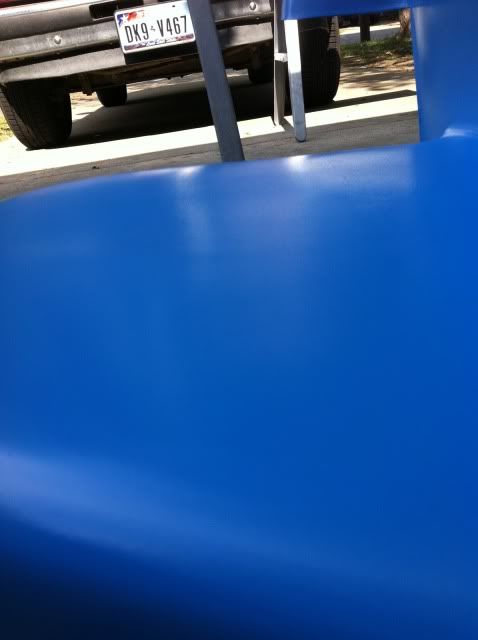 |
Settled In
Posts: 60
Joined: Wed Aug 15, 2012 9:03 am Country: USA |
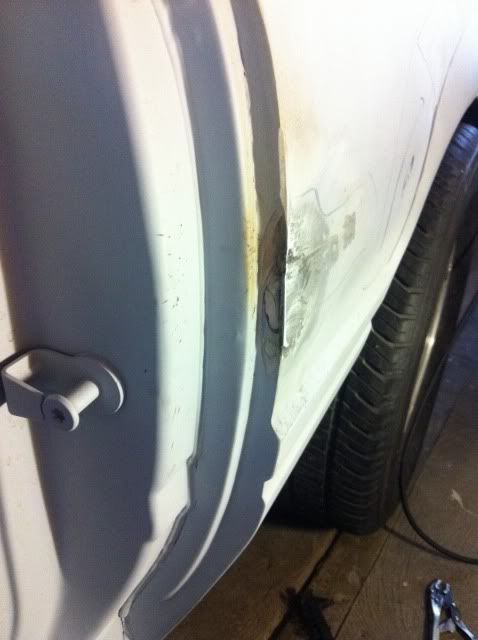
It's slowly getting there. Ive spent about 12 hours on the rear 1/4 already(including welding) and still probably need another 12 to get it just right. I'm no pro.. I'm having to reshape/blend 4 body lines and it's a pain in the ****. Wouldn't have been so bad had the previous owner not "repaired" with a hammer and 1" of filler.
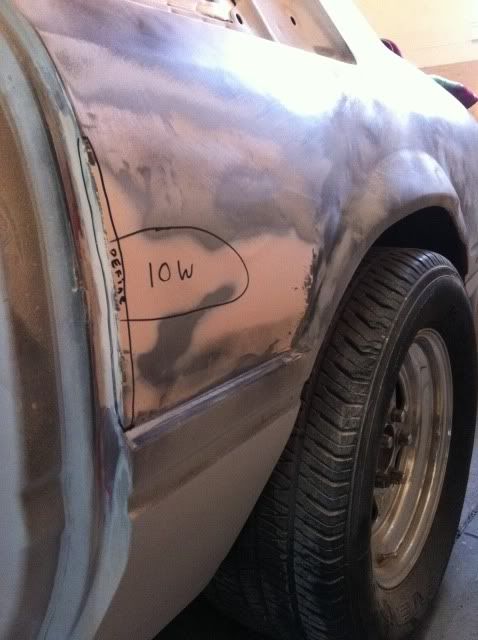
  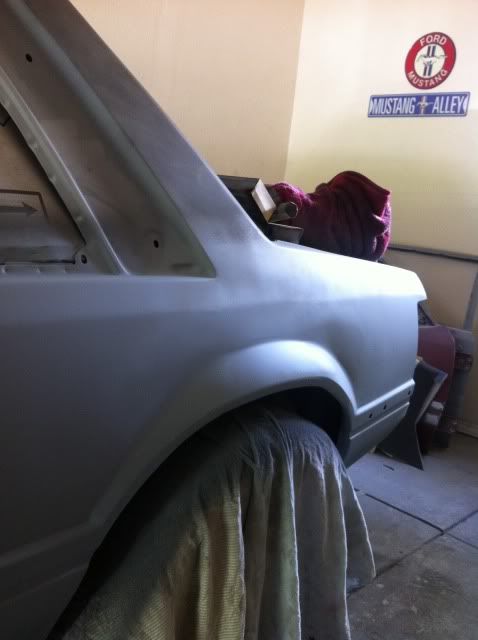 Got a little more work done today. First coat of 2k primer getting blocked out 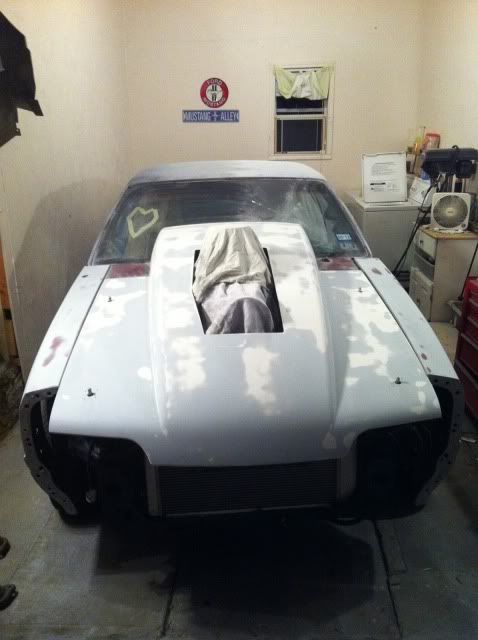 And the second coat. You can see the 2k primer is doing it's job. Alot less low/high spots. 2 more round and it should be ready for color.  And a little more work on the rear 1/4. Still have a low spot to fill in the rear and a little more shaping of the rear arch but glazing putty will finish the rest. Getting closer everytime. 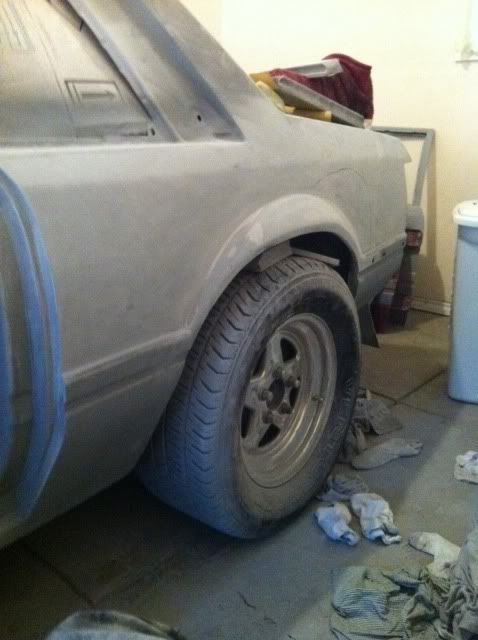 |
 Top Contributor
Posts: 3110
Joined: Wed Dec 01, 2010 10:52 pm Country: USA |
I would suggest some more pulling before anything else. When you are starting out with filler rough the qtr lips with 40 then 80 grit. Looks like a good panel for some poly primer.
Never argue with an idiot, he will drag you down to his level and beat you with experience.
|
Settled In
Posts: 60
Joined: Wed Aug 15, 2012 9:03 am Country: USA |
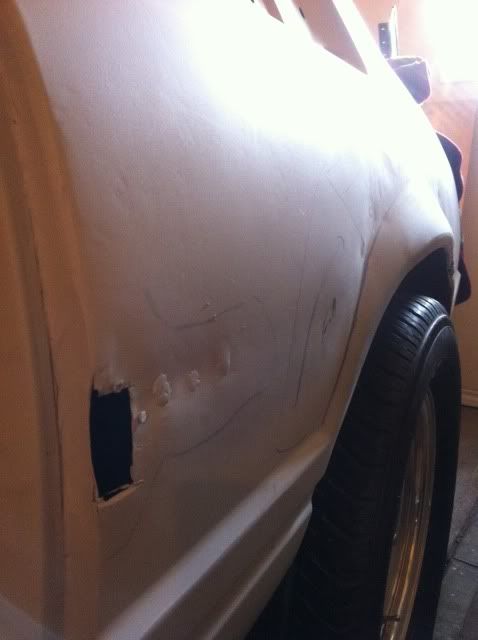
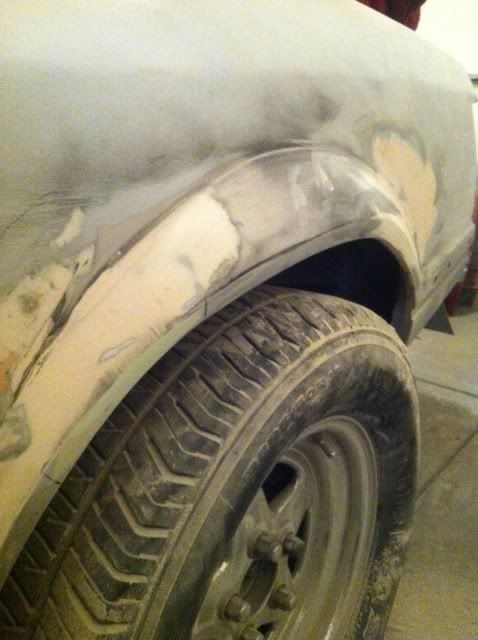
I've pulled as much as I feel I can without distorting the body lines to have a reference of where I need to shape but someone with more experience could probably get it much closer before hitting it with filler. I'll likely end up replacing this whole 1/4 with a donor in the future. I don't exactly enjoy having so much filler back there. While no one would ever know when I'm done, I will. And it will eat at me... This is my first real dive into body work. My area of expertise is sheetmetal/chassis fabrication. This is a whole new world to me.  Here is what I started with when I uncovered this mess.  The whole 1/4 from tail light to door was body filler. At least now I've Removed it all and I'll likely end up with less than 1/4 the filler then the previous owner used. I cut out the worst spots and welded in good sheetmetal, used about 150 plugs pulling everything as straight as I feel comfortable with, and used a hammer/dolly on the fender lip. The whole 1/4 from tail light to door was body filler. At least now I've Removed it all and I'll likely end up with less than 1/4 the filler then the previous owner used. I cut out the worst spots and welded in good sheetmetal, used about 150 plugs pulling everything as straight as I feel comfortable with, and used a hammer/dolly on the fender lip.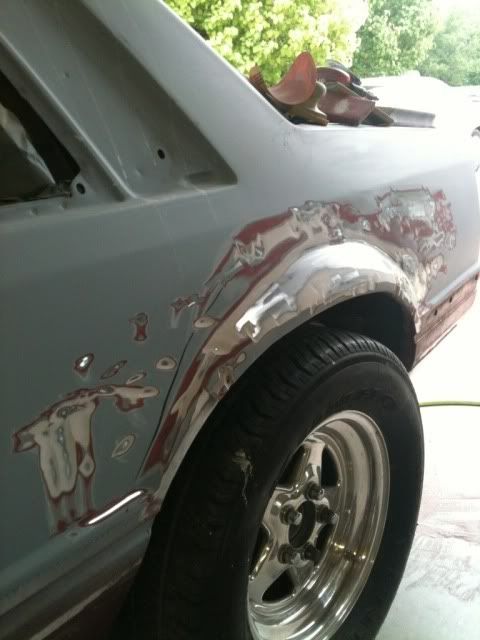 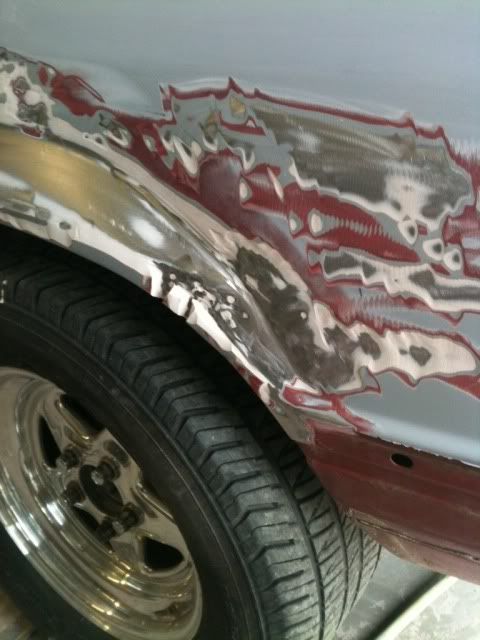 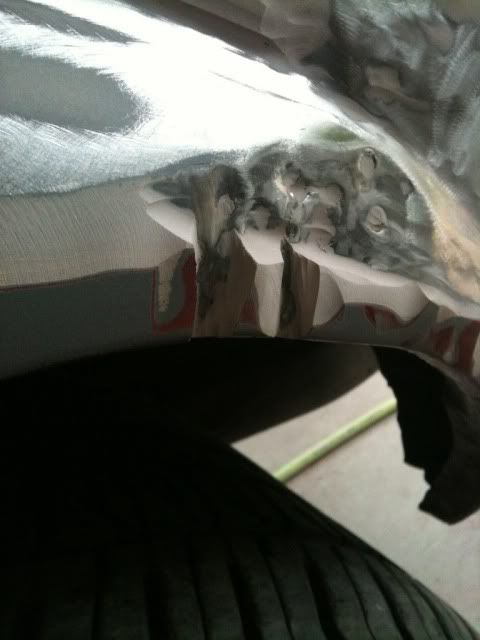 |
Top Contributor
Posts: 3110
Joined: Wed Dec 01, 2010 10:52 pm Country: USA |
Looks like you have came a long way.

Never argue with an idiot, he will drag you down to his level and beat you with experience.
|
Settled In
Posts: 46
Joined: Thu Jan 05, 2012 10:56 pm Country: USA |
Outstanding car you have there. I have always loved those coupes. I sold a 93 a couple years ago that I would give 3 times what I sold it for to have it back now. Please be sure to keep us posted on this.
|
Return to Completed & In Progress Member Projects
Users browsing this forum: No registered users and 106 guests