1974 Honda CB750

Show off your work! Anything from final results to full start-to-finish project journals.


Settled In
Posts: 22
Joined: Wed Jul 10, 2013 12:33 pm
Location: Norfolk, VA
Country:
USA
PostPosted: Mon Jul 15, 2013 9:42 am
Newby here. Like the subject line states I have a 1974 Honda CB750 that I have completely rebuilt. I am down to the final stages. The tank and front fender are steel, the seat pan is fiberglass, and the side panels are polyurethane high heat plastic. I have been doing a lot of reading and searching here and have gained some valuable information. I originally etch primed the tank and fender after stripping them to help stave off rusting since I had a tripped planned to the mountains and was going to take the bike with me. I have since stripped the etch primer off. This is the plan I have moving forward so hopefully it is correct. I am always open to suggestions, help, and comments.

Steel parts - Prime with an epoxy primer followed by a filler primer. Block sand to get smooth.
Fiberglass - Prime with an epoxy primer followed by a filler primer. Block sand to get smooth.
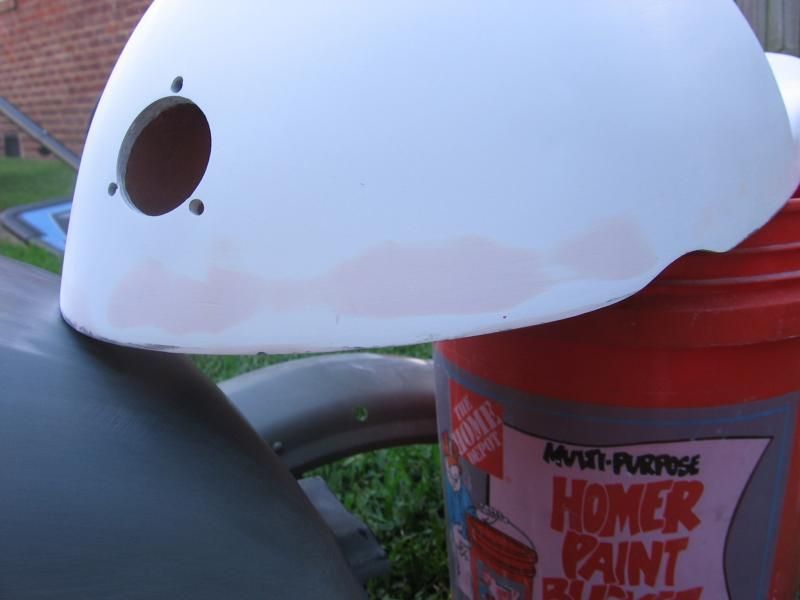
Plastic - Treat with an adhesion promoter followed by a filler primer. Block sand to get smooth.

The day I brought it home.
Image


As it sits now. The colored parts are powder coat (except for the engine).
Image

Image

And the parts I am working on.
Image


Image


Image


Image


Image


Image


Image


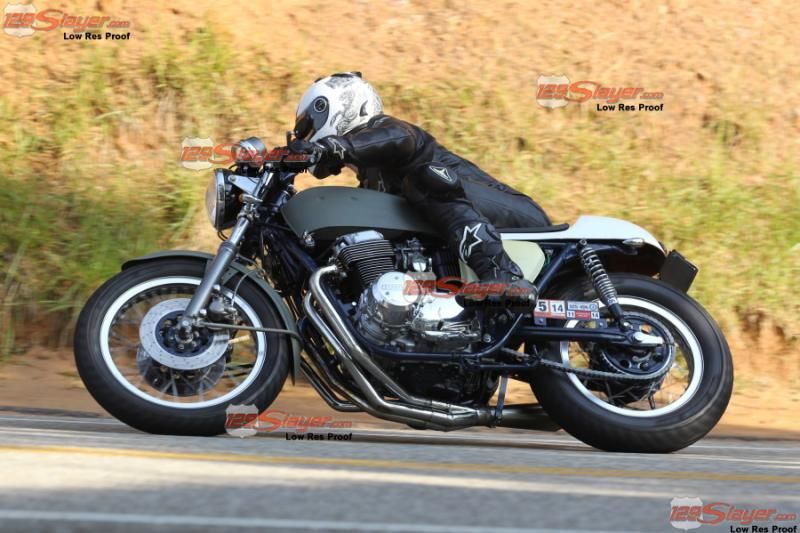
And an action shot of me in the mountains.

Image

User avatar

Board Moderator
Posts: 9897
Joined: Fri Oct 20, 2006 12:40 pm
Location: ARIZONA
PostPosted: Tue Jul 16, 2013 8:55 am
Nice project.
I noticed on the left side of the tank there appears to be some corrosion (dark spots) next to an possible under the filler. I strongly advise you to media blast those areas clean.
Also, on your plastic parts, you should consider using epoxy primer after the adhesion promoter and before the 2k (if the 2k is even needed.)

What color are you going with?
1968 Coronet R/T


ACTS 16:31


Settled In
Posts: 22
Joined: Wed Jul 10, 2013 12:33 pm
Location: Norfolk, VA
Country:
USA
PostPosted: Tue Jul 16, 2013 10:02 am
Thanks for the reply and info.

There was some corrosion there that I have since taken care of. I have no issue epoxy primering the plastics, I just thought I read somewhere here that you don't do that. However, I could have completely misread something. It might actually make it a little easier to spray everything at once.

I may have lucked out and found a professional painter to spray my parts for me. I have been helping a friend work on a house he rents and the renter is the lead painter for a local hot rod shop. The renter wants to buy the house when the lease is up so I was more than happy to help him put up a new fence and do some work to the screened in porch. I am hopeful that if I buy the materials (primer(s), paint, clear) and do the prep work that he will spray and buff out the parts for me.

Regardless, for right now I am going to proceed like I am going to do it.


Settled In
Posts: 22
Joined: Wed Jul 10, 2013 12:33 pm
Location: Norfolk, VA
Country:
USA
PostPosted: Wed Jul 17, 2013 9:44 am
Need some advice here.

I am going to have some pinup girls airbrushed on the side covers. When should that be accomplished? After the last color coat is applied and before the first clear coat, after the first layer of clear, etc. Is there a sealer or something I need to put over them before the clear? It might be a number of days between the color or clear before I will be able to get them airbrushed on. Would that be an issue with flash times and what not?

User avatar

Board Moderator
Posts: 9897
Joined: Fri Oct 20, 2006 12:40 pm
Location: ARIZONA
PostPosted: Wed Jul 17, 2013 7:31 pm
Check this thread out: viewtopic.php?f=12&t=20379
1968 Coronet R/T


ACTS 16:31


Settled In
Posts: 22
Joined: Wed Jul 10, 2013 12:33 pm
Location: Norfolk, VA
Country:
USA
PostPosted: Thu Jul 18, 2013 5:10 am
That is pretty cool. I am going to have to look into possibly doing that.


Settled In
Posts: 22
Joined: Wed Jul 10, 2013 12:33 pm
Location: Norfolk, VA
Country:
USA
PostPosted: Fri Jul 26, 2013 7:35 am
Ran into a little issue. The previous owner of the seat pan did not drill the hole for the brake light correctly. It is off center (left to right) by a decent amount. If I was going with a solid color it would probably be OK, but I am planning on having a racing stripe so it would stand out like a sore thumb. This is my plan to fill the hole so I can re-drill it in the proper location. Please let me know if I am missing a step, doing something completely wrong, or have a better plan of attack.

Find a piece of fiberglass or plastic about the same thickness and cut a circle just smaller than the hole that was drilled incorrectly.
Rough sand the edges of the circles to give them some tooth for a later application of body filler to adhere to.
On the back side of the seat pan lay some fiberglass matt an inch or so bigger than the hole with some resin and set the piece I cut out in.
Once that dries lay another piece of fiberglass matt an inch or so bigger than the piece I already laid.
Fill in the voided area(s) on the outside of the seat pan with body filler and sand smooth.
Drill hole in correct location.

Image


Non-Lurker
Posts: 3
Joined: Fri Jul 05, 2013 12:22 pm

Country:
Canada
PostPosted: Sun Aug 11, 2013 12:56 pm
Hey,
Great thread. I will be watching for updates. I'm getting into the same things as you with my 66 Olds and 81 Honda GL500. Both need a resto, and I want to do some air brush work with them.

About patching the brake hole, I'm no expert, but I'd want to do the process you are talking about, but fill the voids on the outside surface with fiberglass resin, not body filler. I think when you try to cut the new hole, the body filler might want to crack or break off of the fiberglass along the edges of your new cut, and it might get more messy than it needs to. Plus I think the resin would make a stronger bond.

You could also take a look to see if there are any slightly bigger rear brake lights you could buy and just put on in a way that it covers the old hole and is centered properly. Wouldn't hurt to shop around since you might find something you like even more than the one you have. Just a thought.


Settled In
Posts: 22
Joined: Wed Jul 10, 2013 12:33 pm
Location: Norfolk, VA
Country:
USA
PostPosted: Thu Aug 15, 2013 8:12 am
66s...Thanks for the reply.
That is a good thought on the filler chipping when I drill the new hole. I am sort of in a quandary here. I had thought about drilling the new hole after I have it painted to ensure that it is centered in the race stripe. However, that would require some body filler to be used and I would hate to chip fresh paint. The brake light does cover/extend about 3/4" around the hole so it would cover any minor chipping, but it still worries me. What I don't want to happen is to drill the hole before paint and not get it centered. That would stand out like a sore thumb.


Non-Lurker
Posts: 3
Joined: Fri Jul 05, 2013 12:22 pm

Country:
Canada
PostPosted: Fri Aug 16, 2013 1:33 pm
Harsh wrote:66s...Thanks for the reply.
That is a good thought on the filler chipping when I drill the new hole. I am sort of in a quandary here. I had thought about drilling the new hole after I have it painted to ensure that it is centered in the race stripe. However, that would require some body filler to be used and I would hate to chip fresh paint. The brake light does cover/extend about 3/4" around the hole so it would cover any minor chipping, but it still worries me. What I don't want to happen is to drill the hole before paint and not get it centered. That would stand out like a sore thumb.


I'd rather cut before painting too. How about just laying down some tape to mark out where the stripe will be before you cut the hole? You could even dust on some paint to get a good visualization and sand it off for the real paint job.
Next

Return to Completed & In Progress Member Projects

Who is online

Users browsing this forum: No registered users and 90 guests