Good day all. First post as I start into a new project and a hearty "Thanks" for providing this forum. It is amazing what you can learn from people willing to share knowledge and experience. Anyways, in the past, I've done bodywork, priming and painting but that was many many years ago. Back in those days, you could still get lacquer paints. Paints and associated technologies have certainly changed.
This is a 1971 Jaguar E-Type that was painted with I am assuming was a single stage enamel a good 15 years ago by the previous owner. There is a lot of orange peel. The bodywork is in real good shape with no dents or dings, just occasional paint chips. Given the design of the car, I am going to work on it in sections. i.e. Bonnet first, doors and rear hatch second and the remainder of the body last.
What I am looking to do is to get it to a point where it is sealed/primed and prepped to be sprayed with BC/CC. My environment is good enough for spraying primer and I have access to a much better environment for the final coats. Plus my neighbor who has this "Better" environment knows how to spray quite well.
I really don't want to take this back to bare metal if I can avoid it. The doors might likely need it though and they might just get taken to a local shop where someone better at doing bodywork can handle them.
My plans change as I learn. My initial plan is to.
- Sand down the old paint job to get rid of the orange peel.
- Deal with some surface rust areas.
- Fill the paint chips now or wait until after after the epoxy primer?
- Prime with a couple layers of epoxy primer.
- Do a guide coat.
- Block sand the epoxy primer coat.
- A few filler primer coats.
- Block sand.
As I mentioned. All of my plans are preliminary at this point.
Thanks again!
I'll add pics as time permits.
New project. What are starting strategy options?
10 posts
• Page 1 of 1
Settled In
Posts: 13
Joined: Mon Jul 10, 2017 10:41 am Country: USA |
|
No Turning Back
Posts: 602
Joined: Fri Feb 03, 2017 7:36 am Country: USA |
A nice vintage car like that deserves a good job. Strip it all to bare! You have a questionable paint job over the original paint, you do NOT want to put a third paint job over that. Excess film thickness, as well as different paint materials over each other. The other issue would be the chips. Trying to fill them will probably have them showing up later, after paint. Materials shrink. Feathering them out will be difficult with your existing thickness of 2 paint jobs.
Other than that you seem to know the drill. |
Settled In
Posts: 69
Joined: Wed Apr 05, 2017 4:01 pm Location: Vegas Country: USA |
A 71 E type should absolutely have the best you can afford to give it. That's a great classic ride. Job out the body work you don't think you can do, though maybe you could learn on the doors. With the age of that car you're going to need to go to metal at least in the rust places to make sure what looks like surface rust is on the surface. It's likely once you strip it down you'll find the rust is a bit more than you thought. Those areas will still need to be prepped and primed. It's not that bad going to metal just more time, tools and material.
So what color? Jag British Racing Green? |
Top Contributor
Posts: 6777
Joined: Tue May 19, 2009 7:10 pm Location: OREGON COAST |
 Jay D. Jay D.
they say my name is Jay
|
Settled In
Posts: 13
Joined: Mon Jul 10, 2017 10:41 am Country: USA |
Luckily the odds of dealing with any rust through on the body is small. These Jags have inherently had problems with rust through on the rocker panels and according to the PO, mine never had that issue.
Going back to bare metal is likely the most sound advice that I can follow. If I ask advice and it makes sense, then I follow it. This does make sense. From a bodywork perspective, the one thing that I like about this project is that it can be broken into sections. - The bonnet. If there are any imperfections in it, they will be very light. - The doors and rear hatch. The rear hatch is perfect. I've been considering taking the doors to some shops for quotes to get them into shape. They are the only flat surfaces on the car so I want them to be as good as possible. - The main body. I've not seen anything with it that would lead me to believe that it is not sound. So far... I've pulled the headlamp buckets(?) in order to more easily remove the lower spoiler panel at the front of the bonnet. There is some light metal work to be done on a rectangular opening at the bottom of it but it shouldn't be too big of an issue. I did find out that paint prices are much more than they used to be back in the good old days. I am going to use High Teck 77425 as recommended by my local paint shop. It sounds like a good product and a gallon should handle everything that I'm doing. Once I get to the point of using it, I'll then use a regular sandable primer with a guide coat and block sand it. It is going to be painted the original color of Antique white. From all that I understand, white is a very forgiving color. Of course BC/CC and I the plan is to cut the CC to get rid of any orange peel. This is not my car but it looks just like this except it has wire wheels. 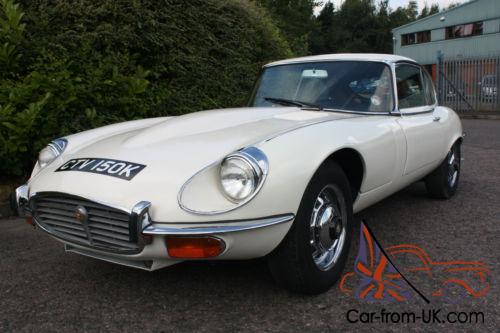 |
Settled In
Posts: 13
Joined: Mon Jul 10, 2017 10:41 am Country: USA |
Great advice so far. Thanks. For the record. I work as a test engineer and we usually are planning 3 or 4 steps in advance of our current tasks. Whenever I plan on doing something, I've already done a lot of research and have a pretty solid game plan laid out in my mind.
The High Teck DTM primer/sealer that I am using is gray. I've read in other threads where it is not a good idea to use a sanding primer that is the same color as your epoxy primer. I am not sure if my DTM primer is a light or dark gray. As I block sand out the next layer or 2 of primer, I don't want to eat into the DTM layer so I would lean toward using a primer with a different color. It that real important or will there likely be enough difference to tell? My final color will be Old English White. Would it be good to use a white primer? I don't plan on skimping on the base coat paint but it seems that the BC coverage would be much better with a white primer underneath it. Thanks again! |
Top Contributor
Posts: 6777
Joined: Tue May 19, 2009 7:10 pm Location: OREGON COAST |
i'm a little confused ( but that's normal ) about your priming and sanding you say you don't want to eat into your DTM layer as you block. that shouldn't be a problem. also your epoxy PROBABLY will be a different shade than the DTM. the normal sequence is to first epoxy then use your DTM or any HI build primer to block smooth. any light color should be fine under the white, white covers quite well
Jay D. they say my name is Jay
|
No Turning Back
Posts: 602
Joined: Fri Feb 03, 2017 7:36 am Country: USA |
If the colors are too close in your primers, you could always add just a splash of black to one to exaggerate the difference. White is a good hiding color, so I wouldn't worry about going over light grey.
You might even consider using a single stage white, instead of BC/CC. I prefer it if the color is not a metallic or pearl. Less material, less cost, and it will look more like the original paint ( not a "plastic-y" shine that clear gives) |
Settled In
Posts: 13
Joined: Mon Jul 10, 2017 10:41 am Country: USA |
The High Teck DTM primer that I am using was recommended by my local bodywork supply house. It is an epoxy hybrid DTM primer/sealer. I am defering to their expertise as to the quality of the product.
http://www.highteck.com/voc-high-solids ... ealer.html Badsix, the plan is to get to bare metal first, hit it with this primer and work out any imperfections before going to a high build primer prior to blocking. I've just read on here that you don't want to sand through the epoxy layer. I am still learning quite a bit. Chopolds, in the end I might go with a single stage paint seeing as it is a simple white. I fully expect to have to cut and buff CC if I go that route and am not familiar enough with single stage paints to know how they would handle cutting and buffing. That is still several months out so I have plenty of time to read and absorb advice before making any final decision. |
Top Contributor
Posts: 6777
Joined: Tue May 19, 2009 7:10 pm Location: OREGON COAST |
great, the DTM primer sounds like it will work good for you. its not the end of the world if you sand through the epoxy. if during blocking it might be a hi spot. or if you sand through were you've done some filler work. just spot prime that area with your epoxy. sounds like your on the right track with your schedule. white urethane S/S is good and usually buffs easy. your doing good by using an auto body jobber for your supply's
 Jay D. they say my name is Jay
|
10 posts
• Page 1 of 1
Who is online
Users browsing this forum: Google [Bot], grump and 106 guests
Powered by phpBB© 2000, 2002, 2005, 2007 phpBB Group
Advertisements by Advertisement Management