Man that looks like a ton of work.
Good you have the know how to get it done.
Malibu to Aston Martin conversion
44 posts
• Page 3 of 5 • 1, 2, 3, 4, 5
 Board Moderator
Posts: 9898
Joined: Fri Oct 20, 2006 12:40 pm Location: ARIZONA |
1968 Coronet R/T
ACTS 16:31 |
|
Top Contributor
Posts: 6234
Joined: Tue Sep 16, 2008 1:17 pm Location: Pahrump NV. Country: USA |
Hi Mark
I checked out Your old web sight love the 61 Dodge, 53 Merc, 53 Packard, and the Copper cart The 34 Terraplane was awesome as well. My one of these days project:  I did not create this rendering a Man of Forward look did BUT this is What I want it too look like If I can ever get my hands on The front Bumper and all the New window seals door seals and window felts for it : 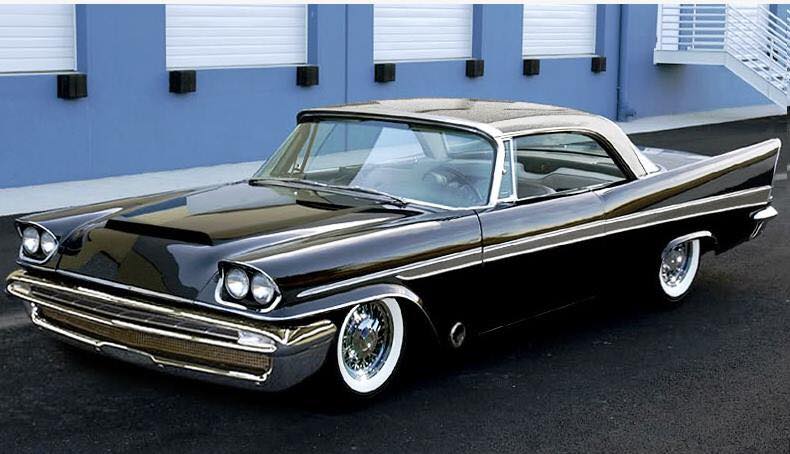 I have a few projects in the way first before I can start on it so I will keep collecting parts. I wanna Learn How to do Old school roof Chop's from Gary Child he lives hear locally been a little while since I check up on him and his Projects I owe him a Visit. he used to Hang out with Darrel Starbird quit a bit, He wanted to use My Paint Booth for Two of the cars he was working on a Gorgeous chopped and sectioned 40 Ford coupe and a 33 Ford sedan. You might remember  We wont talk about its current condition and owner. http://downtownmotorcarsales.com/pontia ... g-car.html I also am Fortunate To Live close by Craig Hendrickson founder of HO Racing hes Doing a Wild custom build on a Packard called the Panther right now Frame and suspension are done working on body work and engine right now. http://1956packardpanther.com/Panther/P ... Index.html Dennis B.
A&P Mechanic, FCC General radio Telephone Operator Line Maintenance A&P Mechanic and MOC Tech specialist. |
No Turning Back
Posts: 602
Joined: Fri Feb 03, 2017 7:36 am Country: USA |
I love the subtle styling you're going for on your car, Dennis. I know both your friends names from custom circles, too. I saw one of the original Panthers at Amelia Island a few years ago, didn't look like Craig's concept, though.
A friend of mine moved to Pahrump a few years back, retired. I did the custom bodywork and paint on his 82 Olds. Maybe you've seen it around? He did sell it a couple years ago, daughter is very sick, to pay medical bills. Before you look....it was ALL his ideas! I admit to building it, not designing it! Hahaha!
|
No Turning Back
Posts: 602
Joined: Fri Feb 03, 2017 7:36 am Country: USA |
To quickly finish off the hood, he wanted a dropped center in it. The skin was too large to fit in my bead roller, so I put bearings in the dies, and adapted them to my Wheel. Worked well, as I could really vary the depth of the drop-off. I even had to put a couple flat dies on it later, to get a deeper drop than my offset dies could do.
|
|
Top Contributor
Posts: 6234
Joined: Tue Sep 16, 2008 1:17 pm Location: Pahrump NV. Country: USA |
Never occurred to me an English wheel could be used like that but it makes perfect sense.
Dennis B.
A&P Mechanic, FCC General radio Telephone Operator Line Maintenance A&P Mechanic and MOC Tech specialist. |
No Turning Back
Posts: 602
Joined: Fri Feb 03, 2017 7:36 am Country: USA |
Jumping around a bit. How about door handles? I removed the rear ones completely, due to the new bulge in the door. The fronts I could have, as well, but with the car being so new, it might have to go through state inspection. SO I wanted a mechanical means of opening them. I usually make my own flush mounted door buttons, but wanted something different on this one.
My buddy Ron, who I did a body-off-frame resto-custom for, on his 70 Impala convertible, suggested using the new Kendig Customs door handles. He's got great taste and style, so I listen to whatever he says. I picked up a set, and here we go! Had to remove a large area around the stock handle, due to the recess for it. Also had to make a small 'bellcrank' and attach it to the backside of the Kendig handle, as it pushes inward, while the Malibu needed a downward action to work the latch.
|
No Turning Back
Posts: 602
Joined: Fri Feb 03, 2017 7:36 am Country: USA |
Since we cut off half the fender scoop, when I trimmed the fenders to fit, I had to build the scoop onto the door. Lots of discussion about the shape of the scoop, and what else to do to it. I made a bulge on the front fender to meet up with the wider fender, and transition it into the rest of the door. All done in metal. I then built a stainless steel spear to intersect the scoop. Did it in stainless to avoid the hassle and cost of taking it to the plater (more on this later!) Put some mesh behind the spear, and it's ready to go, right?
Wrong! A new Aston came out, the Vulcan. that had a different type of scoop on it.
Last edited by chopolds on Sat Mar 18, 2017 6:44 pm, edited 1 time in total.
|
 Site Admin
Posts: 3450
Joined: Tue Jun 17, 2003 3:02 am Location: New York Country: USA |
amazing progress! thanks for sharing the photos; very interesting project.
|
No Turning Back
Posts: 602
Joined: Fri Feb 03, 2017 7:36 am Country: USA |
About a month or 2 after I completed the scoop, a new Aston race car came out with a different type of fender treatment, that the owner liked better. So we went round and round with drawings, and tape offs on the car to se how we could transfer that opening to his car, without removing all the previous work.
We decided on a shape, and I cut it out of the fender. I had to create edges on the top and bottom to finish it off, and there was a lot of curvature going on, it 2 directions. So once again, the old shrinker stretcher came out and I made mirror duplicates in steel, for both keeping both sides the same, and also, as a support for the fiberglass while I made them. I would attack the form on the front, then 'glass up the backside. Then grind the front and 'glass up the front.
|
No Turning Back
Posts: 602
Joined: Fri Feb 03, 2017 7:36 am Country: USA |
Glass was followed by Duraglass, then regular filler for the fine tuning. I had 2 ideas for spears for the opening, and he picked the diamond shaped one. I liked the other better!
This time I made them out of steel ( al lot easier), and was going to use a chrome powdercoat to finish them. Well, after a bunch of trials, the powder failed. Kept bubbling up. So I smoothed out the imperfections in 95-5 lead free solder, and brought them to the chrome plater, keeping my fingers crossed they wouldn't lose them. My fears were unfounded, and they came out great!
|
44 posts
• Page 3 of 5 • 1, 2, 3, 4, 5
Return to Completed & In Progress Member Projects
Who is online
Users browsing this forum: chopolds and 93 guests
Powered by phpBB© 2000, 2002, 2005, 2007 phpBB Group
Advertisements by Advertisement Management