Here a pic of the car as it sits. I have had it for about 10 years and I am ready for change.
I promised myself after I build my truck I will freshen up my car. The plan is a C4 IFS, LS 6.0, and change of color scheme. Very few body mods on this one.
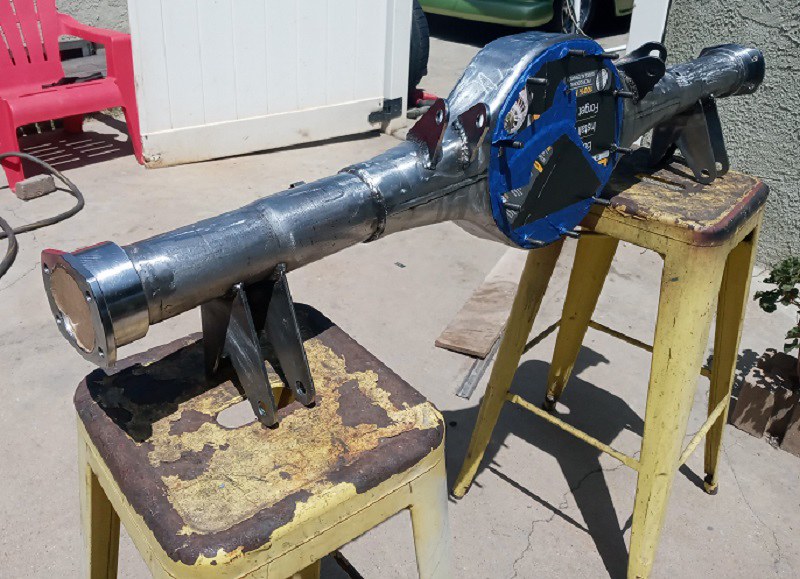
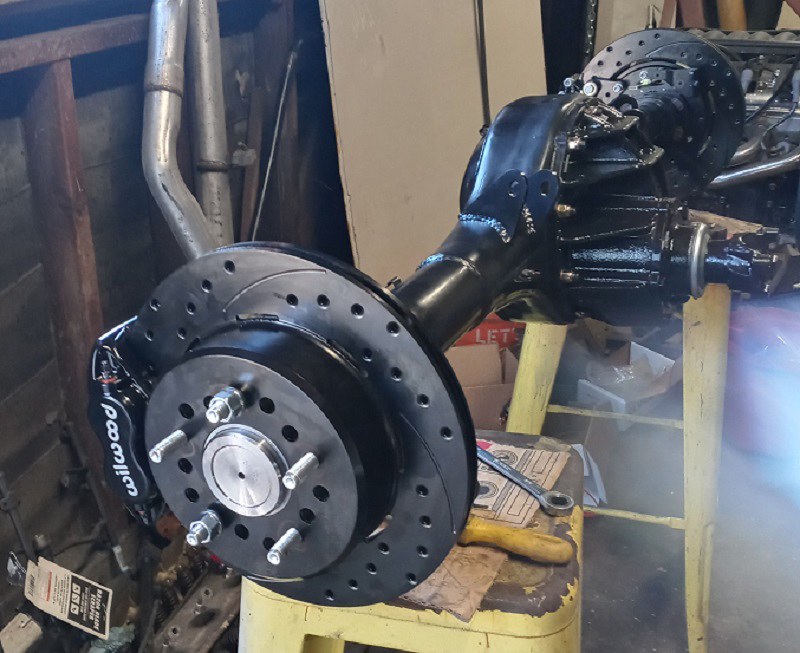
I found a 1988 C4 suspension and got started.
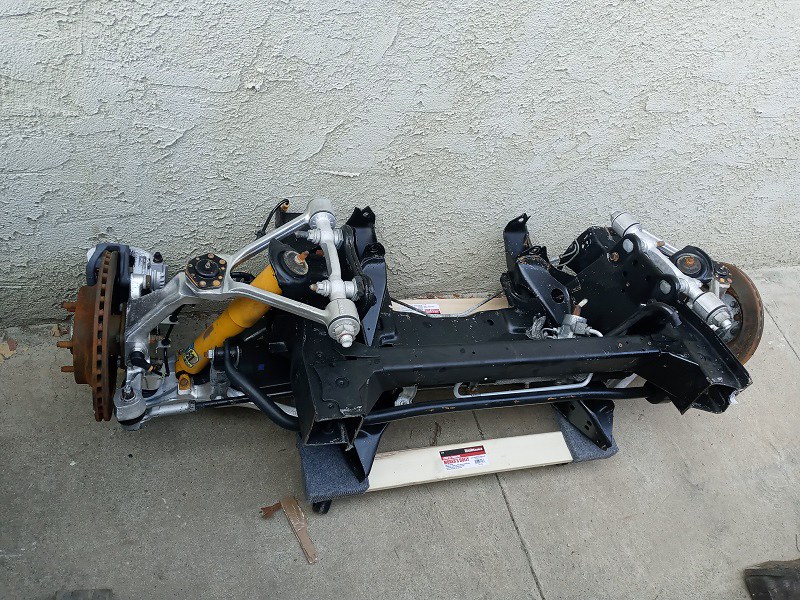
I purchased a Flatout Engineering Cross member, which I will modify to fit what I am trying to do.
Now that is all together I can see what needs to be done.
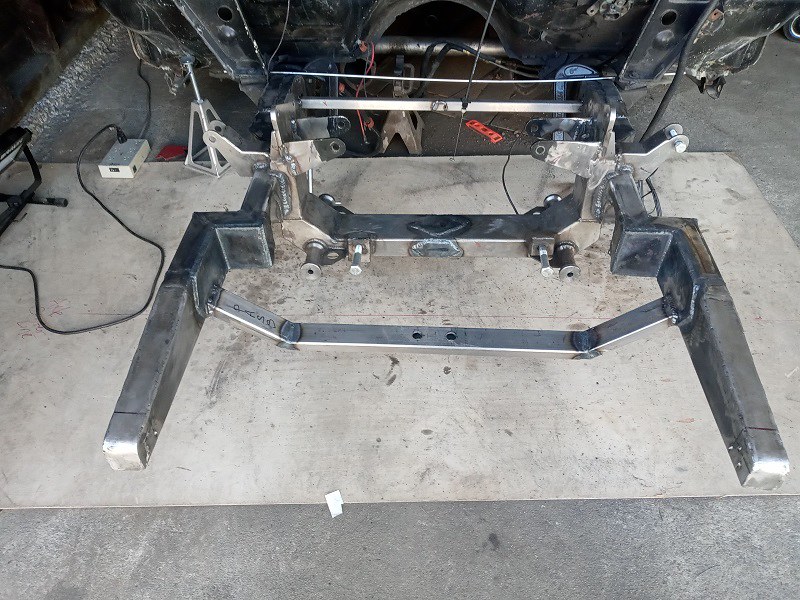
I made frame rails that will slide inside the 55 210 frame rails.
I than tapered the front of the frame rails to give it a clean streamline look.
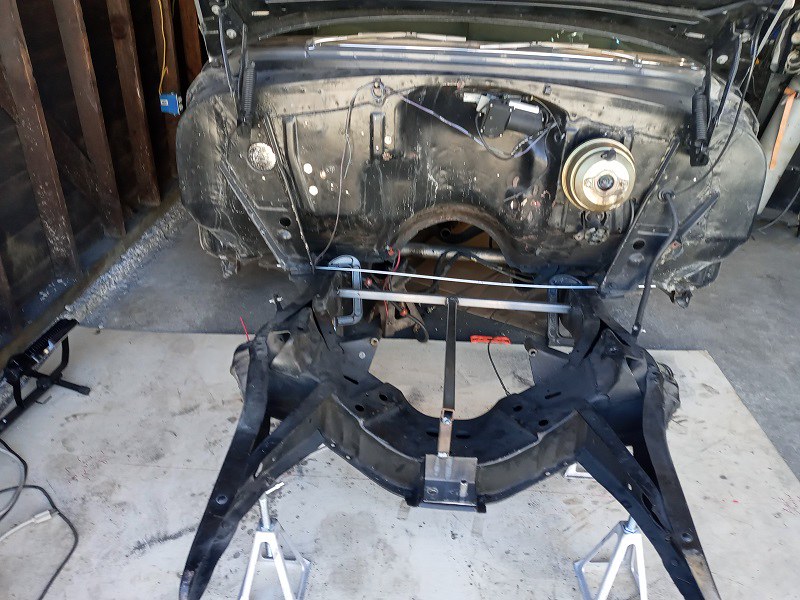
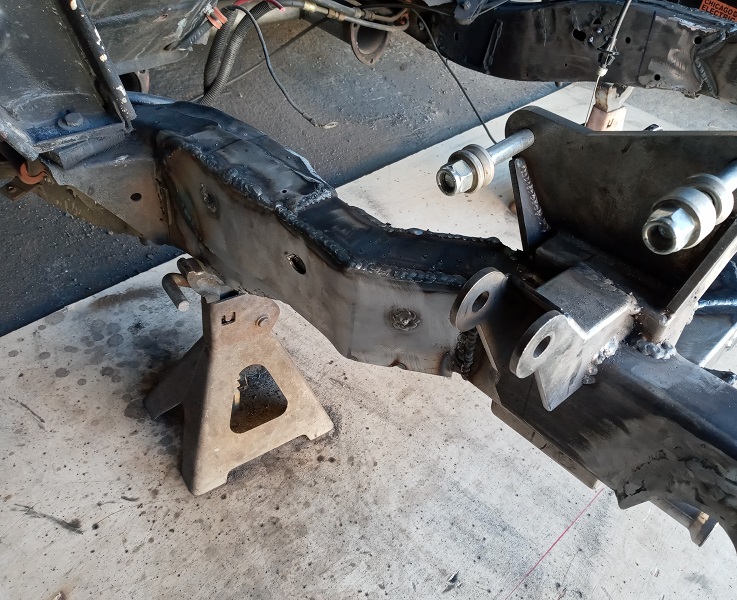
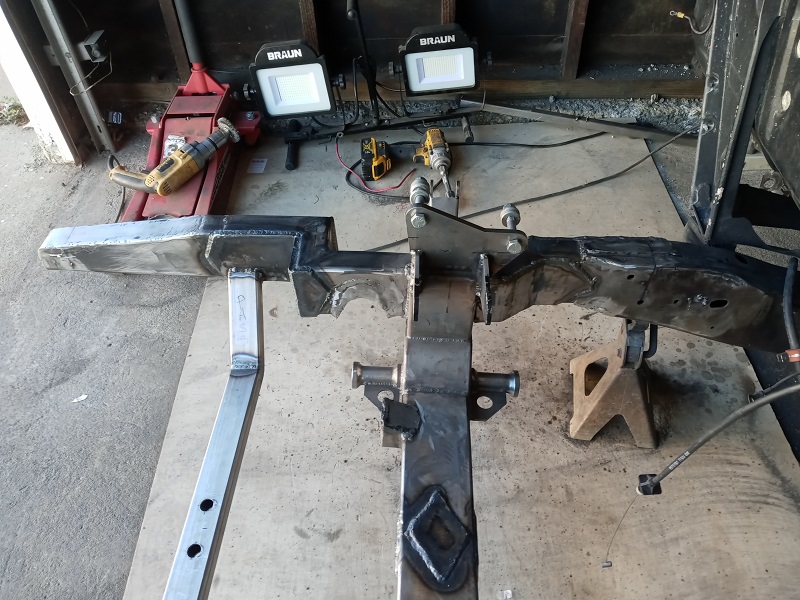
Well I decided to make a change. With install as it exists, my choice of wheels will be limited. So I decide to re-engineer it by narrowing the clip 2 inches and ditching the corvette rack and pinion and installing a 1988 T-bird rack which will solved the pivot point issues because its pivot points will match the clip when it’s narrowed.
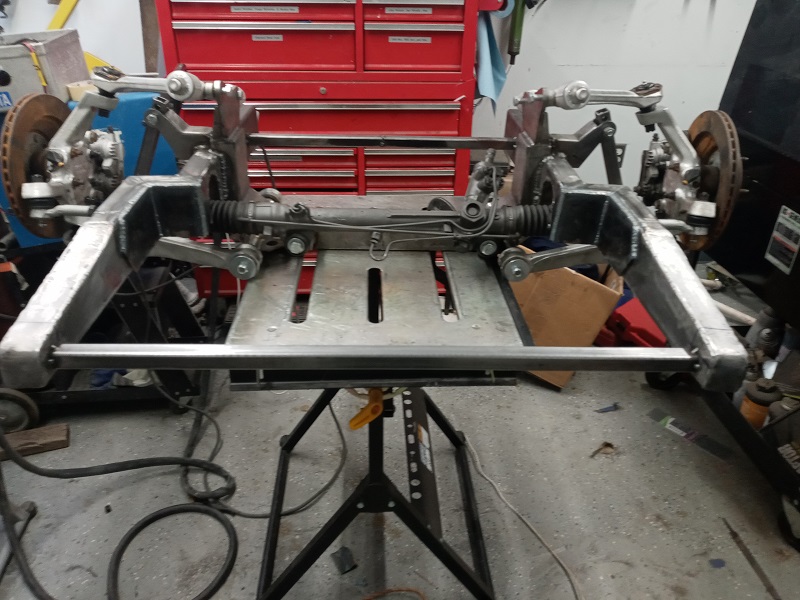
The Clip is complete now the track with is close to the stock 55 track width.
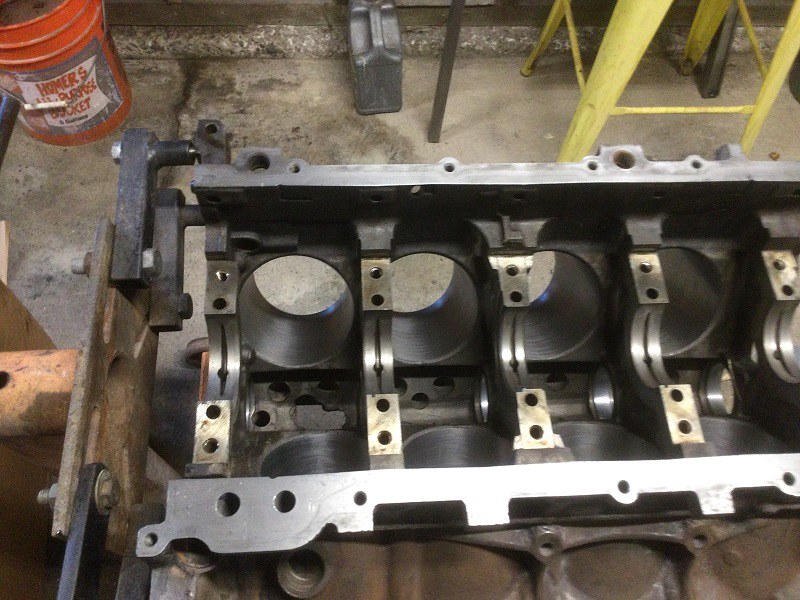
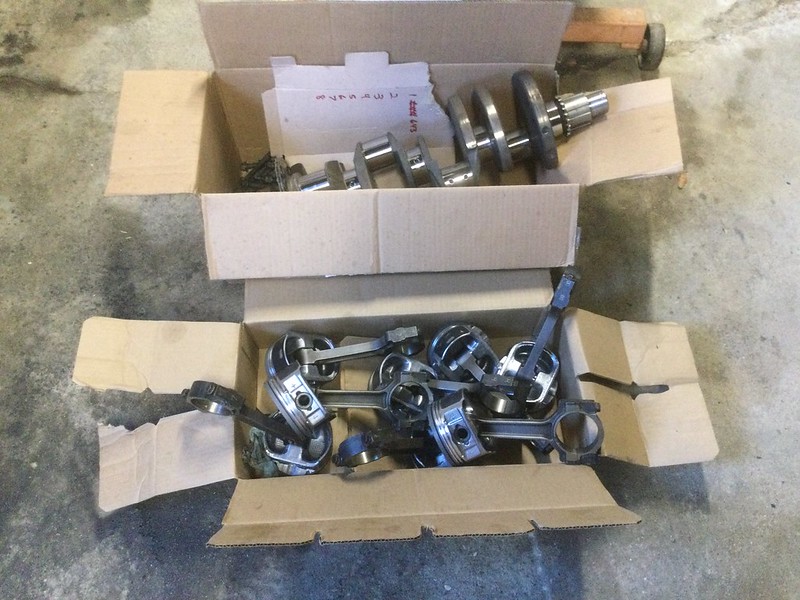
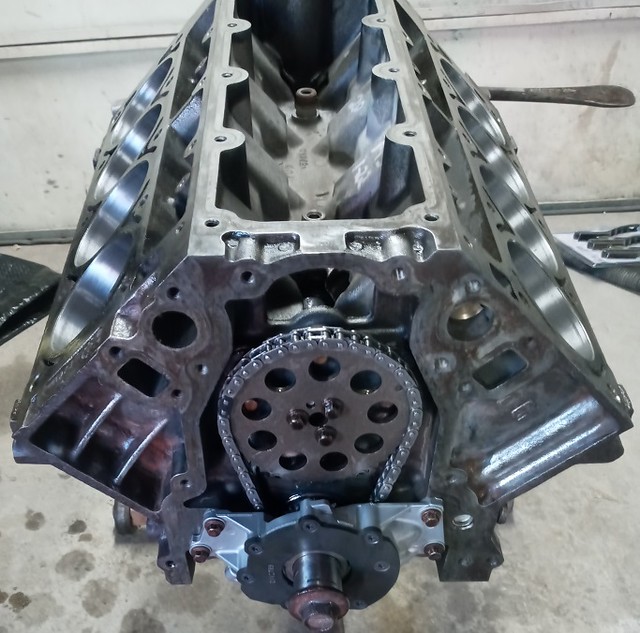
I found a 6.0 out of a 2003 Cadillac Escalade. The engine was filthy, but when I took the oil pan off to check it out, the bearings and cylinder walls were in good shape. I decided to get the block hot tanked and cleaned. So I could just rebuild it. I also had the crank cleaned and polished.
55 Chevy 210 Remodel
13 posts
• Page 1 of 2 • 1, 2
The engine has a stock bottom end with with new pistons, sloppy stage 2 cam, 243 heads, harden push rods, PAC-1219 springs, and stock rocker arms with a Trunion kit
On the top I'm using an LS6 intake manifold, Slightly Modified Stock Truck Alternator and Power Steering Bracket, 2002 Camaro Water pump with 3/4 spacers, Idler pulley relocation bracket, and 2002 Camaro Belt Tensioner, and a Billet Fuel Rail kit. Steering Bracket, 2002 Camaro Water pump with 3/4 spacers, Idler pulley relocation bracket, and 2002 Camaro Belt Tensioner, and a Billet Fuel Rail kit. Well its time to install the C4 suspension. Everything is measured and ready for the removal of the old suspension Out with the old No turning back now Its ready to be tack welded in. I measured a hundred times and its square. Well its welded in, so I made the radiator support and removed the little jig and the front brace. Installed the C4 components for mockup Put a fender on to see how well I mocked up the axle centerline. I likey This is how I added extra strength and tied the clip to the original frame. I also added more bracing for the c-notch for the rack. I will grind smooth the rosette welds on the side. |
|
Top Contributor
Posts: 6234
Joined: Tue Sep 16, 2008 1:17 pm Location: Pahrump NV. Country: USA |
Dam Dude You got Mad Fab skills
I was wondering when you were gonna start on this one Looks like you been workin your Butt off on it already WOW! Dennis B.
A&P Mechanic, FCC General radio Telephone Operator Line Maintenance A&P Mechanic and MOC Tech specialist. |
No Turning Back
Posts: 602
Joined: Fri Feb 03, 2017 7:36 am Country: USA |
Ver nice work! The Flat Out crossmember is a nice piece. We used it on the 54 Plymouth. Narrowed 4 inches. Did you have to modify the mounting points to use the T Bird steering? No one makes a 4 inch narrow Vette rack for PS.
|
Thanks for the compliments man I really appreciate it. As far as working my butt off, as I tell my wife "Its not going to build itself".lol
Thanks man. Yes I had to cut off the vette rack stuff and fab the mounts for the t-bird rack. It was pretty easy to do. I don't know of any power rack that is 4 inches narrower. |
|
I narrowed and rebuild my Ford 9 inch. I will installed Torino axle ends and a Willwood brakes.
This is one of the jigs I used to measure how much to cut. It gives you the centerline and the axle length once the rearend is narrowed. In this pic I marked my cuts. The cuts are made, its time to weld on the new axle ends. Using this jig allows me to weld on the axle ends square. The axle ends come beveled and I also beveled the axle tubes for maximum penetration. I also took advantage of mocking up the rearend while it had no weight. This allowed me to move it with ease and weld all the 4 link mounts. Ready for paint Cut to fit axles ready for installation. Once painted I installed a new 3rd member. Its Posi with 3.70 gears. Rearend is complete and ready to install in the car. |
|
Man, you are in a league all by yourself, brother.
Did you cut the axle shafts? I am guessing that the cuts would be made at the outer ends? Looking great. 1968 Coronet R/T
ACTS 16:31 |
|
Top Contributor
Posts: 6234
Joined: Tue Sep 16, 2008 1:17 pm Location: Pahrump NV. Country: USA |
Hey Bam
I have seen those Jegs for figuring axle tube length & center line BUT I am curios about that JIG you used to center the ends with the Bar through the Tubes NICE where you get that? I am also curious How you figured out were to mount your 4 link upper mounts how did you figure out the angle of the dangle? GOOD stuff their! I been looking into that kinda stuff lately off and on anticipating upcoming projects. Dennis B.
A&P Mechanic, FCC General radio Telephone Operator Line Maintenance A&P Mechanic and MOC Tech specialist. |
100% Agreed, I want to live next door to Bam so I can bug him daily with questions and ask for free help. I will provide sandwiches. Truly impressive!! Keep those photos coming. Sent by the random thoughts from the voices in my head...
|
|
Thanks man. Yes I did cut the axle shafts, and yes you are correct the cuts are made on the outer ends. Also I bought cut to fit axles, the ones I purchased came with 9 1/4 inches of spline. The center section came from ITC I already had the bar that came with mockup solid bearings. I bought the on ebay years ago. Thanks for the kind words. |
|
13 posts
• Page 1 of 2 • 1, 2
Return to Completed & In Progress Member Projects
Who is online
Users browsing this forum: No registered users and 96 guests