Bloverby,
I have a CLub Car torn apart in my shop right now getting ready for paint.
Do you use a flex additive at all, I am thinking it's not necessary, but was wondering what your process is.
Also, can regular 2k and epoxy be used on the bodies? My plan is to spot any repairs with 2k, then use epoxy as a sealer.
Thanks.
Tim
Club Car Fun (update)
40 posts
• Page 4 of 4 • 1, 2, 3, 4
|
|
|
 Top Contributor
Posts: 1167
Joined: Fri Oct 28, 2005 3:03 pm Location: virginia |
I don't use flex on 'em.
I do use adhesion promoter on any raw plastic before priming. Most guys want the holes for the pads filled in, for that I use a scrap piece of a cart body as a filler to weld the holes up w/ a paddle tipped soldering iron. To fill gouges, etc. I use Evercoat polyflex over 1 coat of day old Epoxy. It'll work over small areas of raw plastic but I like to use Epoxy first. After the polyflex has been sanded I'll use 2k. On the carts that are in really good shape to begin with I just use epoxy reduced as a sealer over a 400 grit scratch. I try to keep the film build down as much as possible. |
|
Thanks bloverby, that is helpful. I did my own cart a couple months ago, but it is an older Yamaha and was fiberglass.
Now a couple of guys at the course want me to paint theirs, I just tore it all down today, that's the worst part I think. Lot's of screws. |
|
Top Contributor
Posts: 1167
Joined: Fri Oct 28, 2005 3:03 pm Location: virginia |
The Club Cars come apart easier than the Ez-Go's.
|
|
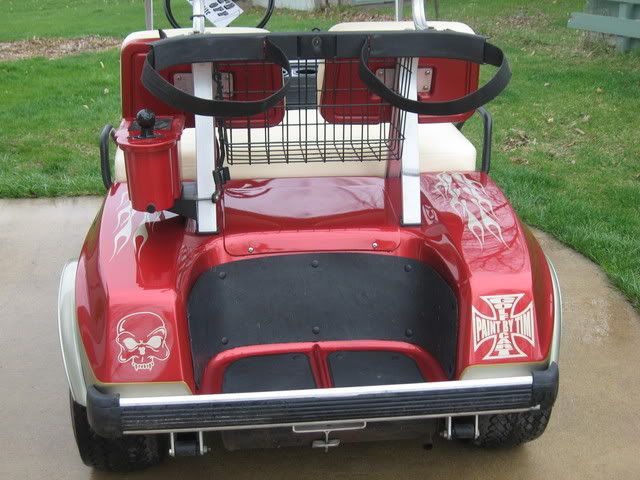
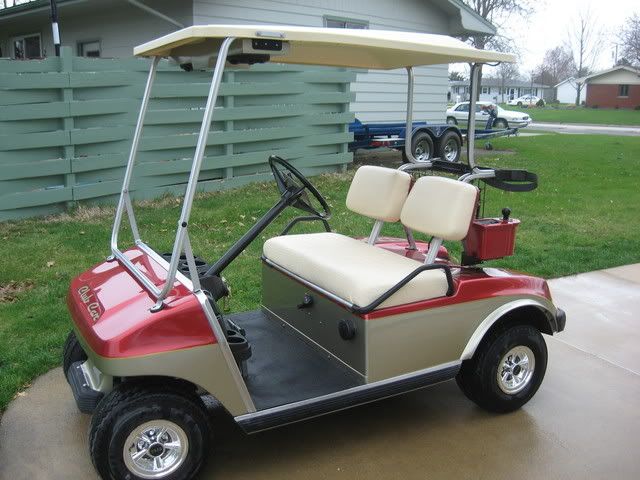
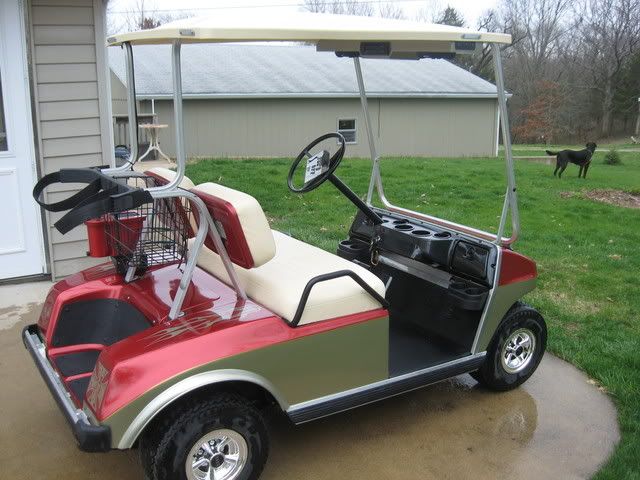
Thought I would revive this thread to show my club car project, it is finished and at the golf course now.
    |
|
Top Contributor
Posts: 1167
Joined: Fri Oct 28, 2005 3:03 pm Location: virginia |
Nice.
|
Fully Engaged
Posts: 185
Joined: Wed Apr 16, 2008 11:11 am Location: MASSACHUSSETTES |
Cool, must be fun little projects. You really need to add some detail up in there man, put some smoke on them with some realistic looking flames, sorry lol, one thing I could never stand is classic stenciled or "cartoon" flames...
I wouldnt be able to resist.. Paint looks good though knowledge is power, power is experience
|
|
I don't have an airbrush, been thinking about getting one.
That is the first time I have ever painted more than a solid color paint job. First two-tone, first use of paint mask. |
|
Fully Engaged
Posts: 185
Joined: Wed Apr 16, 2008 11:11 am Location: MASSACHUSSETTES |
^^.. Ahh, makes sence...
Real sh!tty example but I was messing with the airbrush last night before going to bed... Did it on a peice of plywood I use for sotering so there were burn marks and flux stains all over it.. Not too bad though   knowledge is power, power is experience
|
Fully Engaged
Posts: 185
Joined: Wed Apr 16, 2008 11:11 am Location: MASSACHUSSETTES |
 messin around again.. Getting better, these are the first times I have tried free hand airbrushing with nothing to go off of..[/img] knowledge is power, power is experience
|
40 posts
• Page 4 of 4 • 1, 2, 3, 4
Return to Completed & In Progress Member Projects
Who is online
Users browsing this forum: No registered users and 79 guests
Powered by phpBB© 2000, 2002, 2005, 2007 phpBB Group
Advertisements by Advertisement Management