[ihttp://s266.photobucket.com/albums/ii242/cstray1/?action=view¤t=P8300195.jpgmg]
Trying to post pictures. Will have it figured out here in a min.
[imhttp://i266.photobucket.com/albums/ii242/cstray1/P8300195.jpgg][/img]
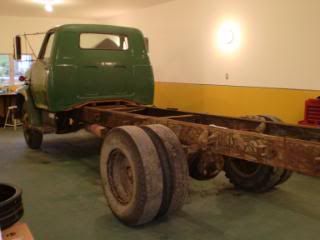
1968 GMC 5500
3 posts
• Page 1 of 1
Settled In
Posts: 30
Joined: Tue Oct 16, 2007 5:41 pm Location: Watson Lake, Yukon, Canada |
|
Settled In
Posts: 30
Joined: Tue Oct 16, 2007 5:41 pm Location: Watson Lake, Yukon, Canada |
 |
Settled In
Posts: 30
Joined: Tue Oct 16, 2007 5:41 pm Location: Watson Lake, Yukon, Canada |
Finally got it figured out. This was a 3 month project for me. This truck must have had over 100 dents of various sizes all over the cab. The paint is Nason Acrylic enamel Black and metallic blue. Flames are vinyl from Edecals.com. Frame was done with Tremclad Gloss red, and the drive train is Tremclad mat black. Cab was colour sanded using 1200, 1500, and 2000 grit. It was then buffed using a Makita 9227C and the System One buffing system. System One is the easiest buffing system I have ever used. I'm am a loyal customer to them now. The 1878 Dodge W150 Power Wagon shown is the next project. Started that on 3 Jan 08
Interior uphlostery work and new wood for the flat deck will be completed in the spring. BTW. Can anyone tell me how chassis paint would be better than Tremclad Flat black rust paint. I was impressed with how it looks. I have never bought chassis specific paint. IMG]http://i266.photobucket.com/albums/ii242/cstray1/P8300194.jpg[/IMG] 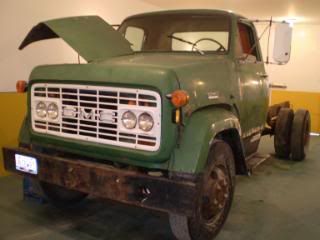   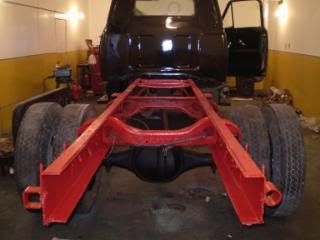 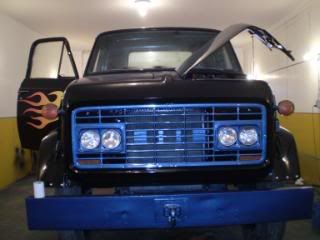 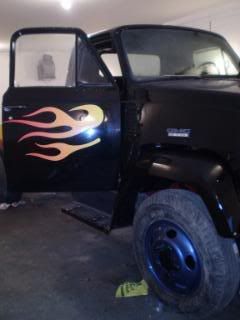 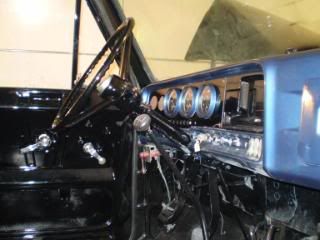 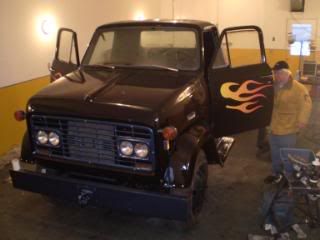 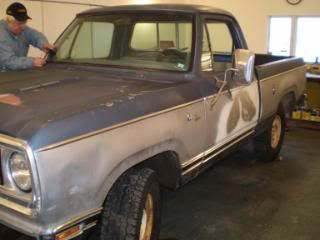 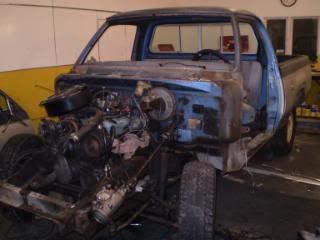 |
3 posts
• Page 1 of 1
Return to Completed & In Progress Member Projects
Who is online
Users browsing this forum: No registered users and 90 guests
Powered by phpBB© 2000, 2002, 2005, 2007 phpBB Group
Advertisements by Advertisement Management