How do I mold my Lip to my front Bumper?

Anything goes in the world of fiberglass and plastic


Settled In
Posts: 19
Joined: Tue Jan 09, 2007 1:01 pm
Location: Ancaster, Ontario, CANADA
PostPosted: Wed May 21, 2008 1:33 pm
I purchased a fiberglass "gfx" lip for my front bumper on my Mazda 6. Dry fitment shows some gaps which when pushed tight against the bumper make good fitment.

Which is the best way mold this into my bumper before painting? Which products should I use?

If I had to guess....I would need to strip the paint off the bumper before mounting, use an epoxy glue, some filler to fix any gaps...primer then paint?

I am a newbie, so please excuse my lack of terminology.

Below are some pictures of the lip itself. Any help is highly appreciated.

Image

Image

Image

Image

Image
Newbie...

User avatar

Board Moderator
Posts: 6683
Joined: Tue Feb 24, 2004 7:00 pm
Location: central Ohio
Country:
USA
PostPosted: Wed May 21, 2008 10:30 pm
Did your manufacturer provide a product sheet with that piece? Since it is specifically for your Mazda 6 you should have instructions which will tell you not only how it should be attached (plastic rivets, etc.) but also tell you if a gluing is even recommended. Since that is fiberglass I would think it is being attached to an existing piece of metal which already may be up under the bumper shroud. Hopefully, you won't be trying to graft that fiberglass on to the plastic bumper cover. If that would be the case I'm not a big fan of "grafting" dissimilar materials like this in an area where you know it's going to take hits. Bumper flexs, fiberglass not so much= cracking, delaminating, etc.
Metal, wood, fiberglass, we work it all... www.furniturephysicians.com We can restore the irreplaceable!


Fully Engaged
Posts: 185
Joined: Wed Apr 16, 2008 11:11 am
Location: MASSACHUSSETTES
PostPosted: Thu May 22, 2008 7:57 am
I've seen and completed multiple molds on front bumpers.. Molded front lips to fiber glass, carbon fiber, metal..

Also, I had someone catch the front end of their car on a good bump going up a hill and cracked the lip in half, and the actual part that was molded held structurally. A buddy of mine molded a lip onto an infiniti G35 for a customer. The customer hit a truck tire on the highway taking the middle half of the front bumper with it, but on both sides the lip was still molded and held..

If I was you.. I'd mount it with all the hardware mounts.. Glue it in place as a temporary hold, glass over the lip and bumper seam.. Filler over that, take down and go over with finish glaze, then the usual work to get smooth and pretty... Should be all set..
knowledge is power, power is experience


Settled In
Posts: 19
Joined: Tue Jan 09, 2007 1:01 pm
Location: Ancaster, Ontario, CANADA
PostPosted: Thu May 22, 2008 2:06 pm
This is an after market lip....and no the manufacturer did not provide me with any specs or sheets.

There are no hardware mounts that came with the lip...what you see is what i've got.

The bumper itself is plastic material, so screwing it into place shouldn't be that difficult. There is no metal to screw it into as it just skirts the front bumper.

The lip itself is flexible as well...
Image


This is what the lip looked lip on my friend Paul's car dry fit
Image


This is what it should look like installed as seen on Nirosh's car
Image
Newbie...

User avatar

Top Contributor
Posts: 3966
Joined: Wed Sep 07, 2005 9:59 am
Location: Louisville, KY
Country:
USA
PostPosted: Thu May 22, 2008 2:17 pm
When I mounted my lip to my civic I bent some aluminum flat
bar into a "z" clip. I riveted one side to the lip and drilled a hole
on the other side to screw it to the bumper underside.
That worked pretty good as I could place them where I wanted,
and the lip remained removeable. 8)

http://i51.photobucket.com/albums/f386/ ... C04025.jpg
JC.

(It's not custom painting-it's custom sanding)


Settled In
Posts: 19
Joined: Tue Jan 09, 2007 1:01 pm
Location: Ancaster, Ontario, CANADA
PostPosted: Thu May 22, 2008 2:22 pm
New Gen:

You are recommending I glass everything together? Would that work in the case of the look trying to be achieved in the above sequence of photos?

Should I just primer then base-clear the lip before install...glue it into place for the "upper" supports, and just screw the rest of it in underneath? Like was suggested by DarrellK?

I'm essentially looking for a clean install that will be manageable. I've done custom fiberglass work for my console to mount my guages in the cigarette lighter area...but haven't really wanted to try exterior work just yet...not on something this prominent.

-----

Just in case the question is asked...why not call the shop the did Nirosh's car?

Answer: the body shop said..."unless we're doing the work, thats our business, and you can figure it out yourself"

so I left it at that. I was quoted $1000 for them to install. I have a DeVilbiss gun...so why not just paint it myself? It's cheaper, and I don't have to pay myself labour...it's the fear of the unknown in the mounting that frightens me.
Newbie...


Fully Engaged
Posts: 185
Joined: Wed Apr 16, 2008 11:11 am
Location: MASSACHUSSETTES
PostPosted: Thu May 22, 2008 2:46 pm
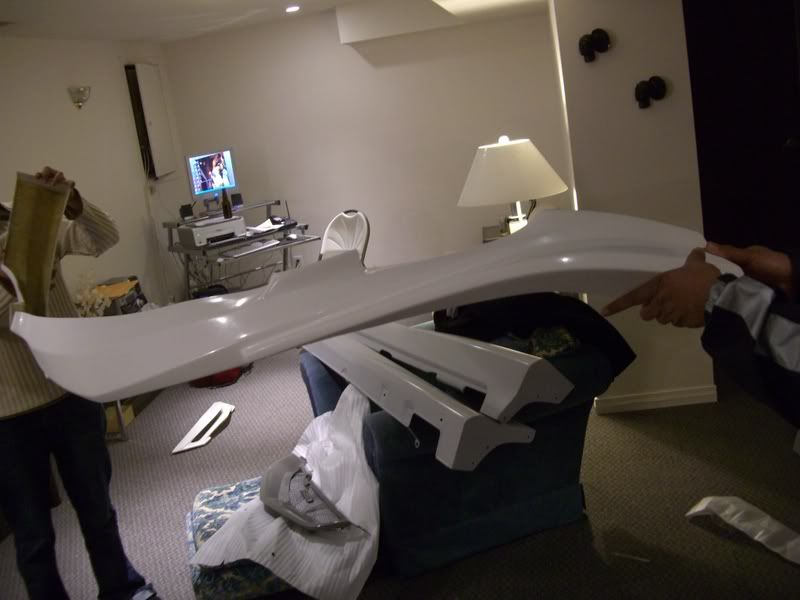
well I think 1k to install a lip is a flat out RIPOFF.. it should relatively be about 300-400 bucks depending on how much they have to shave it to fit right. Unless its off by a nominal margin, and you have to cut it in half to get it right, I can't see it being that much..

Those things are mass produced in molds that are not 100% accurate, so just screwing it on to your bumper isn't going to work 100%, it's not the paint thats expensive its the labor to get the **** thing to fit right..

Best I've been able to tell so far it really depends on how much money you spent on the lip as to if its going to have an OEM fit, usually for a lip in the 350$ + range it'll fit like a charm, anything lower and your looking at lots of mounting, measuring cutting, re mounting etc etc until you have the exact fit your trying to look for..

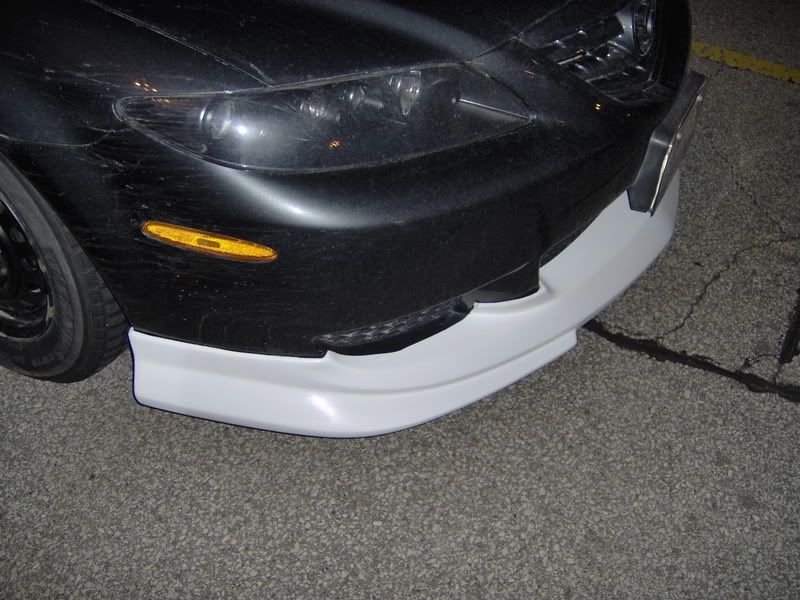
What JC recommended is probably the most manageable way, I'm just a fan of seeing no seems in the front bumpers that's all :)

Try making some brackets to fit the bumper where you want, do some test fits and find whats stopping the lip from fitting perfect and sand it, repeat over and over and eventually it'll look right.. Yes this is why it cost's so much to install these parts AND make them look right..
knowledge is power, power is experience


Settled In
Posts: 19
Joined: Tue Jan 09, 2007 1:01 pm
Location: Ancaster, Ontario, CANADA
PostPosted: Thu May 22, 2008 3:09 pm
Paid $275 for it.

Fits tight as hell around the back corners....I likely could drive around with it installed without even having to screw it in...thats how tight it fits...

the problem lies in the areas I've circled...they protrude out by a 1/8", and don't fit tight unless I push on them. With a little pressure fitment is perfect...but how do I get it to stay that way.

Image


I was thinking epoxy...but in our cool Canadian climate...I would imagine that shrinking and expansion will either spider crack the fiberglass...or break the bond on the glue.

Again...pardon my newbieness...I have a sincere desire to learn, but I also want to get it right the first time.

I look at Dk's work, and I feel inadequete to even be a part of this forum...yet life has taught me that if you don't ask..you don't know....

so...I figured you guys are the experts...and where there are experts there is knowledge, and help.
Newbie...

User avatar

Board Moderator
Posts: 6683
Joined: Tue Feb 24, 2004 7:00 pm
Location: central Ohio
Country:
USA
PostPosted: Thu May 22, 2008 3:47 pm
Ahhh, Claman, don't be so hard on yourself. :) Everybody's got to start somewhere with this stuff. Okay, let's dissect a few things here. First thing, any chance you could get a look at Nirosh's car, say jacked up or on a lift? That would probably tell you a lot about why that job ran the $1000. They might have built a frame work up in there to hold this in place. Wouldn't surprise me. The way that piece sticks out it would be good to have it removable for repair, stone chips, etc. Once you've constructed some type of frame work to hold that thing in place then you can address those circled areas. If they are only off by 1/8 inch you could build the edge out with some Duraglass, then add finely chopped up matt and resin over that for strength. Biggest thing I think is getting this piece properly supported on it's own framework first, then worry about the fitment cosmetics. On my last kit build I had to use 1 inch square tube stock to build headlight bucket supports. All I had was some fuzzy pictures to go by. Measure, cut, dry fit, weld, repeat... I had like 20 hours in those supports. If you don't feel comfortable making the support get some cheap conduit tube at the hardware store and make a "pattern" of what you need and have a local welder do it up for you. Lot's of ways to handle it.
Metal, wood, fiberglass, we work it all... www.furniturephysicians.com We can restore the irreplaceable!


Fully Engaged
Posts: 185
Joined: Wed Apr 16, 2008 11:11 am
Location: MASSACHUSSETTES
PostPosted: Fri May 23, 2008 1:55 pm
well, you could do one of two things...

Mold the whole lip onto the bumper....

OR

Mount the lip onto the bumper, measure what the gap is and fil in the area's that obviously need filling and trim to fit.. The hard part WILL be, if you have no access to a welder to custom mount the lip.. I don't think you have to get to intricate with a frame so long as its mounted correctly to the radiator support and the splash guards on the bumper..

jack your car up, mount the lip in place and lay down and look at it.. Should be pretty straight forward as to where you need bracing on the lip..

If it were me, and I am not an expert but I've gotten a couple of jobs done.. This is what I'd do..

First do you want to take it off for winters? Lots of salt and grime will hit it, so maybe you'd like to simply unbolt it..

I'm not sure what you'll have to work with under a mazda 6, but I've been successful working off the radiator supports with small 16 gauge stock..

Then fabricate some brackets that will mount to this frame, ensure you keep measuring, you can never do it too much, it'll save you time and money on supplies, measure twice cut once.. Good saying

The brackets can be simple, or really intricate interlocking ones.. You might be able to get away with simple L brackets.. Resin mold these brackets onto the lips in the places you should be bracing..

Shave or Add resin as needed to get the correct fitment you desire on the car..

Prep the lip, get ALL THE WAVES out of the fiber glass.. It NEEDS to be primed, and it NEEDS to be leveled..

Paint and fit back on the car... SIMPLE lol.. It's so much more of a pain in the **** then I made it sound but good luck..
knowledge is power, power is experience
Next

Return to Fiberglass and Plastic

Who is online

Users browsing this forum: No registered users and 17 guests