Apexxn.
Yes wet lay up most times is going to look like wavy-gravy. Epoxy resin does NOT lay down and you can't work it like poly filler - sorry. At least I have not found the secret. Epoxy does not kick like poly. It hardens Slooooowly - from liquid to "green" to solid. And if you try to work it in the green stage you get a gooey mess. You can use epoxy filler to the peice when it's close to hard - still can dent it with your finger nail. This give chemical bond.
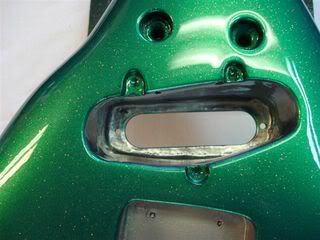
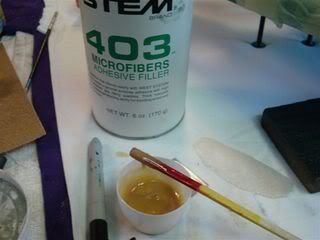
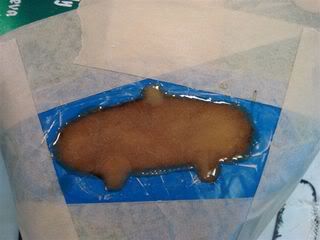
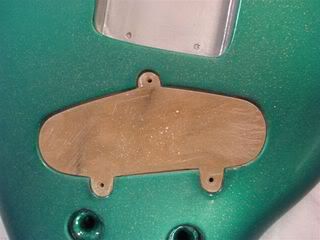
For this plug I made sure the mold (guitar) was level and mixed the resin thick (added fibers) about the consistency of a milkshake. I put down a thin coat to cover the mold. I hit it with a hair dryer, which heats it and thins it at the same time. This makes it go green (harden) faster than normal. But the resin in the pot is still liquid. Once green you can "push" the resin into the corners and tabs. Then I brushed on a thin coat of resin and added the glass matt:
-One layer whole plug
-Three strips into the tabs (this was what I was most concerned to add strength to the tabs - So they would NOT break off when I popped it out from the mold.
-Another layer of glass matt to add strength and tabs.
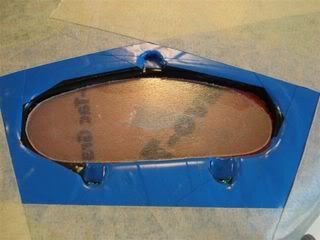
Then added more thickened resin over to add a "gel coat" that I could sand to get flat (without going into the glass mat).
I most times use different color pigment - red, black, white, (and I have use Testors model paint, blue, yellow, silver) to either show you when you have sanded through - or to color a part. Dint need to on this tho.
What I have found is to make the part thick enough with the final layer of resin so when you sand you can flatten it with out using poly filler or a epoxy filler.
This piece is well over the boarder of the mold. It WAS a PITA to knock it down flat because I could not use a file our DA while in the mold for fear scratching the guitar - hence after thought - had I done this early on in the process.
Finally I do a lot of "tests" when messing with resins. Lot of weird "science projects" and have lots of stuff laying around to use the "extra" resin on.
-I have putty knife that has a epoxy handle (made with several coats I made to check / see if I could get the final coat to lay down with out sags / runs.
-A couple of crab knockers I've epoxied and cleared (with flakes).
-checked hardness of resin only, then one, two or three layers of glass mat over 1/4" poly board to see strength
-I've added poly filler to green epoxy to see how it smoothes out the wet lay up and if it delaminates when finishing. It WORKS!!! The "fuse" for lack of a scientific term well.
A lot of this is counter intuitive but a lot of life is.
In my experience a lot of folks that make and sell this stuff don't spend a lot of time in the field to see what can work and what can't. They tell you book answers or what they have the most of in the back to sell you.
It's not the Space Shuttle tiles or glue we are talking about or having to depend on getting us back to the earth safely

OR - more importantly the glue Gilligan found to repair the hull of the SS Minnow. It worked GREAT until he found out by accident it was water soluble. That would be a bad thing on a boat...
Sorry for the rant - Have fun and post the project!!!