Fastening SMC Panels
49 posts
• Page 5 of 5 • 1, 2, 3, 4, 5
 Board Moderator
Posts: 6683
Joined: Tue Feb 24, 2004 7:00 pm Location: central Ohio Country: USA |
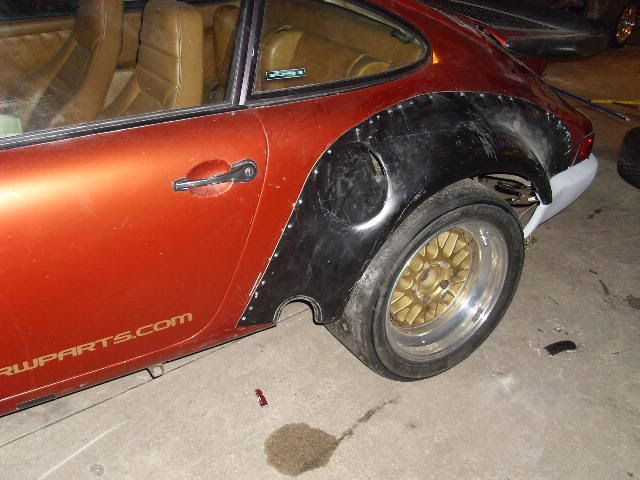
Yeah, you're looking at it in person there, so if you think it needs those cuts, go ahead. Actually that flare is fitting pretty good, body work shouldn't be too bad to get things smoothed out.
Metal, wood, fiberglass, we work it all... www.furniturephysicians.com We can restore the irreplaceable!
|
Fully Engaged
Posts: 327
Joined: Thu Jan 12, 2006 9:09 pm Location: Plainfield, IL |
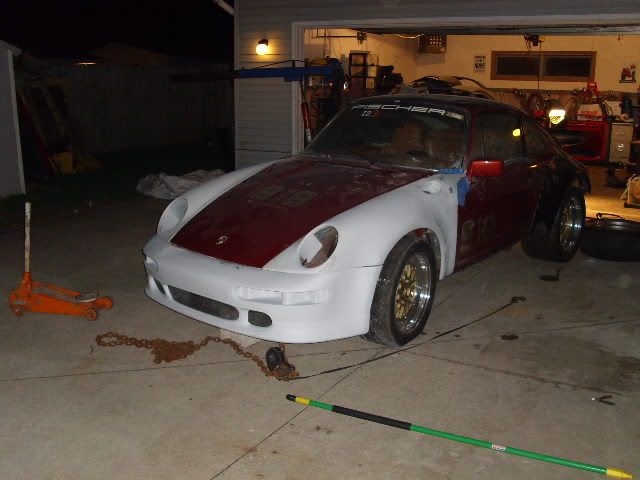
My front end is a little twisted when all together and attached to the car. But everything fits and door gaps are good. Passenger side is low 1.0 inch measured at the bumper. The twist is noticeable in the passenger fender-bumper gap. When I apply upward pressure on the bumper the whole front twists into shape.
I need to make support brackets to support the outer ends of the front bumper. Is it ok to use the support brackets to twist the front into shape and hold it?? Will twisting and flexing the SMC cause problems in the future?? Thanks DarrelK for your valuable time.!! "The smoker you play is the drinker you get"
|
Board Moderator
Posts: 6683
Joined: Tue Feb 24, 2004 7:00 pm Location: central Ohio Country: USA |
Not surprised about the having to "twist" stuff to get it lined up. I don't think I've built one kit car or installed one body kit that I didn't have to twist something into position. Twisting and flexing the SMC shouldn't be a problem unless these parts have been laying around for awhile. In some cases (depends on quality) SMC can get somewhat brittle with age. If that would be the case see if you can get maybe some more re-enforcement behind the area (steel, fiberglass, whatever). If your parts are newer I wouldn't worry about it.
Metal, wood, fiberglass, we work it all... www.furniturephysicians.com We can restore the irreplaceable!
|
Fully Engaged
Posts: 327
Joined: Thu Jan 12, 2006 9:09 pm Location: Plainfield, IL |
[im
  Last edited by Unfettered on Wed Apr 23, 2008 8:15 pm, edited 1 time in total.
"The smoker you play is the drinker you get"
|
Board Moderator
Posts: 6683
Joined: Tue Feb 24, 2004 7:00 pm Location: central Ohio Country: USA |
Yeah, I get what you mean about the ripples between screws. I use a thick style super glue just as "liquid" tacks on the edges. I put a dot of glue and hit it with glue accelerator and push it down, hold it for a minute and it's tacked into place. My wood restoration company makes it own line of super glues in thick, med. thick, and thin plus accelerators. A comparable retail product would be like Zap, Sattelite, etc available at most hobby shops. Even Gorilla brand glues has a new super glue at Home Depot, etc. Many times I use this liquid tacking system when I'm using slower setting epoxies. You can always take a Dremel tool and grind off the super glue area later.
Metal, wood, fiberglass, we work it all... www.furniturephysicians.com We can restore the irreplaceable!
|
Fully Engaged
Posts: 327
Joined: Thu Jan 12, 2006 9:09 pm Location: Plainfield, IL |
After bonding the flare how would you approach blending the edge? Should I feather the edge then apply adhesive Filler? Apply afhesive Filler first then feather the edge? I was going to rough up the whole area with 80 grit before using the Fisor Bonding epoxy. Do I need to use Fiberglass Mat along the edge? Hope not.
"The smoker you play is the drinker you get"
|
Board Moderator
Posts: 6683
Joined: Tue Feb 24, 2004 7:00 pm Location: central Ohio Country: USA |
There's different ways to do this. I always prefer to glue (using the Fusor) my part in place first, make sure that's cured up, sand with 80, then apply more chopped up matt and resin over the entire bond seam out about 3 inches or so away from the seam. I leave that kind of roughed up and do my final bondo style filler and finesse out the whole area further with USC's Body Icing.
I feel the matt is needed over the seam to prevent cracking at that attachment seam. When I go to car shows I see a lot of guys that have done body kits and you almost always see cracking right at the seams because the guys just bond on the part and fill at the seam only. That's just not strong enough to prevent stress cracking from vibrations, etc. Metal, wood, fiberglass, we work it all... www.furniturephysicians.com We can restore the irreplaceable!
|
Fully Engaged
Posts: 327
Joined: Thu Jan 12, 2006 9:09 pm Location: Plainfield, IL |
Hello-Friday at Last and back to the car
"The smoker you play is the drinker you get"
|
Board Moderator
Posts: 6683
Joined: Tue Feb 24, 2004 7:00 pm Location: central Ohio Country: USA |
On those doors I used the Duraglass to get my shape, then I did resin and chopped glass over that in a couple of layers to spread out the stress over a larger area. Yep, then your regular fillers go over top of that.
Metal, wood, fiberglass, we work it all... www.furniturephysicians.com We can restore the irreplaceable!
|
49 posts
• Page 5 of 5 • 1, 2, 3, 4, 5
Return to Fiberglass and Plastic
Who is online
Users browsing this forum: No registered users and 53 guests
Powered by phpBB© 2000, 2002, 2005, 2007 phpBB Group
Advertisements by Advertisement Management