My first post here, but I've been reading a while. Great forum.
I recently purchased a new-to-me 2004 Dodge Ram 1500 that has the usual rust around the rear wheel arches. I just ordered 2 patch panels to repair this, as I want the truck to look nice. I own a construction business, and I want to show up in a decent looking truck to meet customers.
I am not new to body work, but I've never welded in a patch panel before. My welding experience is with both a stick (newer Miller Thunderbolt XL) and mig (Marquette model w/ gas.....6 feed speeds). When I was a kid, I restored a 1974 Dodge Charger, but did no welding at the time.
My welding experience is extensive, but NOT with sheet metal. I do frequent fabrication work for my business with 1/4" or thicker steel and cast iron, and I frequently use both welders.
My questions:
1. When I cut in the arch panel to the truck, how big of a gap should be left between the new patch panel and the quarter panel of the truck. I'll be using my mig welder for this by tacking it in first, all the way around, and then filling in to hopefully limit heat movement of the sheet metal.
2. What wire size should I be using to weld in the sheet metal. I am used to using .045, which is in the welder now. I'm guessing that is way too big. Should I switch to .025 or .030, or ???????? I will make several practice runs on some scrap before proceeding to the vehicle.
Thanks for your help.
Patch panel questions for 04' Dodge Ram 1500
13 posts
• Page 1 of 2 • 1, 2
Non-Lurker
Posts: 7
Joined: Sat Nov 16, 2013 11:10 am Country: USA |
|
 Board Moderator
Posts: 9889
Joined: Fri Oct 20, 2006 12:40 pm Location: ARIZONA |
The same principles for penetration and fill apply with sheet metal so your experience will help you immensely.
I like to use .023" wire for sheet metal but have used .030" in a pinch. Personally i like to keep the gap smaller than the wire diameter to keep weld build and heat to a minimum. Some guys prefer these types of clamps and a wider gap: http://www.autobodytoolmart.com/butt-we ... Qgod9HAAhQ The main thing is to spot weld the panel in place with about 3" spacing the first time around. I like to keep a wet rag to cool the panel from time to time. Second time around spot weld in the center of the 3" and repeat the process until you are welding spot weld to spot weld forming a continuous weld. There are a few videos of the process on YouTube. 1968 Coronet R/T
ACTS 16:31 |
Non-Lurker
Posts: 7
Joined: Sat Nov 16, 2013 11:10 am Country: USA |
Thanks, 68 Coronet R/T (Awesome car, btw). I'm a mopar nut myself, and my favorite of all time was my 69 Dodge Charger R/T. Never should have sold that car.......
 I think I'm going to go with magnets where I can't get my welding clamps behind the panels. Those butt weld clamps you included the link for sure look nice, but it looks like a bigger gap than I am after. I was thinking about attaching my patch panels with sheet metal screws (small hole) and cutting in the patch and cutting away the bad area on my truck at the same time. This technique is used in marquetry in woodworking all the time by hold the cutting tool at an angle so to minimize the kerf of the cut......Any thoughts on this technique in metalwork??? Thanks for your reply. |
|
Making and welding patch panels, like almost anything else without a tech sheet, is a process with differing opinions on how to do it. Such as how we treat a post weld, I like to let it cool naturally without anything to speed up the cooling. Its my thought that faster cooling causes more shrinking and distortion.
As for the way to do the cutting, I'm sure the angle you mentioned works well with wood, but thats because of the thickness of the wood, and sheet metal is not thick enough for that method to help. The best way is to get your patch panel to lay over the rusted area and fit very good. If there is rust or damage that makes the area stick up some, then you may have to cut just that part out first, but the more you leave in, the more you have to judge the fit of your patch with. Its important to make sure you have a large patch because the rust is always worse than you think. Once you have the patch fitting good, then start cutting away the rust. If you can see the back side it will help you immensely in determining the size of the patch, and also how much metal to remove to get all the rust. Otherwise, you have to cut what you think is bad and watch the back side of the waste coming off to see when you reach solid metal. If you have access to the back side, then its easier to scribe and cut the patch to fit the cut out area. If there is no access to the back side and you are sure you have all the rust cut out, then trim the patch down close to the right size---there will be a little less heat build up if you radius the corners, instead of making them square. Once you have the patch shaped and trimmed the way you want it, then I like to use dykem blue layout fluid before using a metal scribe to mark the area to be cut out. 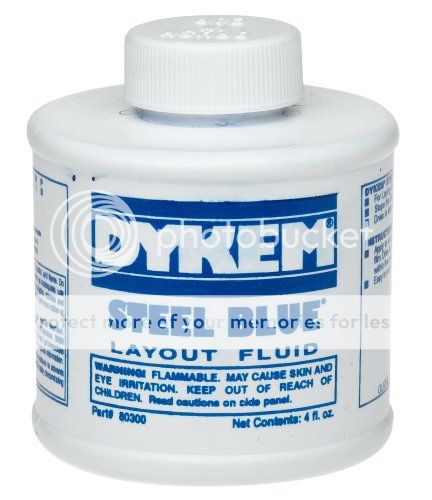  I use a body saw, shears, cutoff wheel, or what ever to get close to the scribe line, then for a patch, final trimming is easy with tin snips to get a good fitting patch. If you have to cut and trim the hole for the patch, its sometimes difficult to use the tin snips, but the cut off wheel can be very tricky to get a good fitting patch. The angle of the wheel is critical because it cuts on both sides, I prefer the body saw. Magnets can be used to hold the patch, as you mentioned, just don't try to weld too close to them. |
|
Board Moderator
Posts: 9889
Joined: Fri Oct 20, 2006 12:40 pm Location: ARIZONA |
Chevman brings up a number of good points.
I tried the "double cut" method using a cutoff wheel but the gap was too big. I still use a cutoff wheel most of the time but cut to the scribed line rather than through old and new metal. For the wheel arch patch I would fit the patch panel over the existing panel and then scribe a line. (If you use screws you will have to weld the holes up so clamps and magnets may be a better choice) Since the bottom lip of the patch panel will keep you from getting it perfectly positioned you need to calculate the thickness of the metal and figure that amount in when scribing/making your cut line. You will need a spot weld cutter to separate the quarter panel from the wheel housing along the lip. Take your time, measure twice, cut once and practice some welds on the scrap metal and you should be fine. 1968 Coronet R/T
ACTS 16:31 |
|
Just be sure the patch is securely held in place while scribing, to get an accurate mark to cut to.
|
|
Non-Lurker
Posts: 7
Joined: Sat Nov 16, 2013 11:10 am Country: USA |
Chevman
I was referring to marquetry in woodworking, which uses wood veneer, which is thinner than sheet metal.....for the record. Thanks for the tips, and I will do it the way you guys suggest. I'm waiting for the shipment of panels to arrive, so I should be able to get at this project next week. Cheers. |
Non-Lurker
Posts: 7
Joined: Sat Nov 16, 2013 11:10 am Country: USA |
A few more questions....
Patch panels arrived. They are painted black, both sides. Do I need to remove this before welding? Also, should I spray something on the back side of the panels before welding, as there is no access from behind after they are welded in? Once the welding is done, what primer specifically is recommended and used by you guys to spray so that I can keep rust off? Thanks. |
Non-Lurker
Posts: 7
Joined: Sat Nov 16, 2013 11:10 am Country: USA |
Anyone??
|
|
It used to be the accepted procedure on new patch panels with an ecoat to test with a rag soaked in lacquer thinner, and if the coating was not affected, then just scuff and spray epoxy. There may be more control over the after market parts for newer cars, its hard to know for sure with all the foreign parts, so some guys say they remove that coating regardless. At the very least, I would use 80 grit on a DA and remove it from the outer surface that will get body color. Maybe some of the collision guys will respond.
Epoxy is the most moisture resistant primer you can put on, and its a good base for your paint system. |
|
13 posts
• Page 1 of 2 • 1, 2
Who is online
Users browsing this forum: No registered users and 31 guests
Powered by phpBB© 2000, 2002, 2005, 2007 phpBB Group
Advertisements by Advertisement Management